


_250h.jpg)


Wanna talk?
HairTalk® is the place for you!
Copyright 1997-2025, hairboutique.com, All Rights Reserved.

Introduction
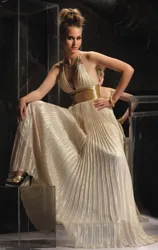
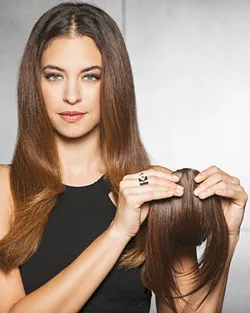
When it comes to finding a sizzling hot hairstyle to wear to Prom, always consider the following factors: 1. The focal point of your gorgeous Prom gown. Do you want to highlight a stunning low cut back or a gorgeous beaded, runched or jeweled neckline? Always select a hairstyle which complements your gown rather than competes with it. 2. What is your overall Prom look? Are you going with a classic, edgy, romantic or other look? 3. Are you doing your hair at home or going to a stylist for your Prom do? 4. What is your prom hair budget? Does it allow for extensions or other add-on hair options? Related Topics: The Hair Accessories Page Prom Hair Countdown Prom Hairstyles & Related Articles Floral Hairpin Hair Accessories - How To Wear Chic Hair Accessories For The Modern Safari Fashion Trend Listed below are 40 hour hairstyle ideas to consider personalizing for your prom: 1. Pony UpFrom the fashion runways to the Red Carpets ponytails have been the go-to hot hairstyle. The good news about the new ponies is there is no right or wrong way to create them. Tails can be positioned high or low, worn straight or to one side and created on a wide range of textures from stick straight to naturally curly. Ponytails can also be amped up with an array of stunning sparkly hair accessories or fattened nicely by adding a clip-on pony to the top of your existing hair.
If you feel a pony is too casual for your prom look keep in mind that most updos are created from a basic ponytail so take your tail to the next level. 2. Pin On A PonyClip on ponytails are fantastic if your own hair isn't long enough to create a pony or if your own pony needs fattening up. 3. Tease Your PonyIf your hair is thin/fine or not really long enough for a big beautiful pony then use a 100% boar bristle brush to backcomb the underneath of a low or mid-head tail. Be sure to avoid using short backcombing strokes. Instead use long broad strokes to guarantee hair will be teased, but not too compact. Use fingers to lightly skim over the top of the tail to smooth. Mist lightly with hair spray. If you prefer to avoid the backcombing routine go with a clip-on pony or add a 10 piece hair extension kit to your hair and then create a fat new pony hairstyle. 4. Wave Your Ponytail
Amp up a ponytail hairstyle by first creating lush waves on your tresses. Cleanse hair, towel blot and apply desired styling formula. Detangle hair from ends to roots using your fingers or a hair friendly wide-tooth comb. Use fingers or wide tooth comb and create a center part from the hairline to the very back of your hair. Direct hair back to the nape of the neck. Gather into a low ponytail with the base at the base of the neck. While hair is still damp separate tail into three sections and create a traditional braid. Plait the hair all the way down to the very ends. Let hair air dry. When hair is completely dry undo the braid and use fingers to tousle. Create a new pony or wear hair down in a wave-a-licious do. 5. It's A WrapCreate a fun high bun updo in an instant. Use fingers or a 100% boar bristle brush and direct hair into a ponytail with a base halfway between the hairline and the crown. The base of the pony should also rest between your two ears.
If you're having a hard time creating a high pony then bend over at the waist and use a brush to create a high line tail. Secure the pony with a hair friendly elastic in the same color as your hair with a Blax or Bungee. Use the boar bristle brush and lightly tease the tail section with broad strokes. Avoid using short choppy strokes which compresses the hair rather than building an airy finish. Smooth the newly teased tail with your fingers. Lift the both of the tail and wrap the tail around the base of the high pony until all the hair has been completely used. Pin into place with bobby pins the same color as your hair. Spray with light hairspray to hold the pony in place. Use fingers to arrange slightly for a great top knot. 6. Get DirtyFashion designers and celebrity hairstylist understand the attraction to hair which is a little bit dirty or roughed up. In the past the provocative bed head look was built upon the concept of hair which had the appearance of being just a little bit aged. Ironically you can create this look on freshly cleansed hair by finger-picking 100% dry hair with texturizing cream massaged into the palms of your hands and distributed through hair. This look works well on ponytails. Mash up the look by gliding a chic headband a few inches behind the hairline. 7. Create Drama With White Or Black Headbands
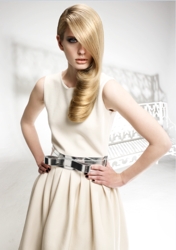
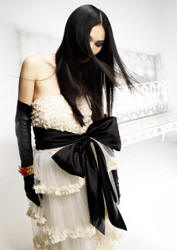
Create a dramatic contrast for your ponytail or bun by sliding a crisp white headband onto brunette or raven black styled tresses. Experiment with thin headbands or a collection of thin bands spaced along the top of your head with the first band positioned just an inch or two from the front of the hairline. For blonde hair create the same dramatic contrast by positioning a black or red headband a few inches from the hairline. If you prefer, play with an array of thin bands or even a slightly wider band. If headbands tend to slide off your head position bobby pins in an X pattern underneath where you'll place the band and use them to act as a hidden anchor. 8. Up, Up And AwayA sky high pony never ever goes out of style. The key to a great high pony is to make sure you block out any frizz or fly-a-way tresses which leave the ponytail looked pouffy. During your cleanse cycle make sure to apply a rinse-out conditioner appropriate to your hair type, texture and current condition. Use fingers or a hair friendly comb to detangle while in the shower. This provides a sleeker finished look.
Finish with a cool water rinse which closes the cuticles and make hair sleeker overall. Before blow drying hair apply a leave-in styling cocktail. Distribute cocktail from roots to the ends to guarantee a super sleek finish. After creating your high pony apply a pea sized drop of shine serum into the palms of your hands and massage. Swipe open palms over the tail of the pony. Remember a little bit goes a very long way. 9. Create a Romantic ChignonA classic boring bun can instantly be transformed into a sassier version of a romantic chignon. Combining a tousled texture and unstructured pinning can do the trick. Cleanse hair and use a long finger diffuser to encourage natural waves to form. After hair is completely dry separate hair into 8 equal sections and starting at the back use a large curling iron to create loose waves. Gather your tresses loosely at the nape of the neck and twist it around in a clockwise direction only once to make sure the chignon hangs loose. Secure the chignon with long bobby pins the same color of your hair. Pin chignon haphazardly to secure it keeping hair loose and romantic.
10. Pin On An Instant UpdoIf your hair isn't long enough to easily wrap into a chignon or bun then pin on an updo in an instant. Follow the steps below: 1. Use fingers or a 100% boar bristle or similar style brush and direct hair back into a pony which rests just a few inches below the crown. 2. Clip in the updo. 3. Add desired hair accessories. 11. Supersize a TwistLike Elizabeth Taylor's big hairstyles of the '60s, the exaggerated French twist is both elegant and outrageous. Slick hair back into a ponytail and tease it with a fine-tooth comb. Then, using an eight-inch foam hair accessory known as a "rat", wrap the ponytail around it, rolling the rat toward the head until it's completely hidden. The hair clings to the mesh covering, almost like it does to a self-adhesive roller, so all you need are a few bobby pins along the seam to hold the twist in place. 12. Create Supermodel Waves
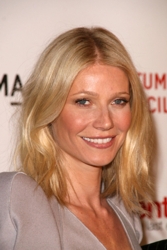
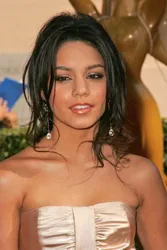
The key to faking supermodel waves is to fatten up your tresses so that they look as thick as possible. Another trick to lush waves is to keep your ends stick straight, which provides a more natural-looking finish. Spread mousse throughout damp hair to bulk it up, then blow-dry with a round brush. Next, roll large sections of hair up in a one-inch curling iron, but leave the ends out. When finished, break up the curls with your fingers—not a brush—to keep the volume intact. 13. Tousle Some Barely-There WavesTousled, barely-there waves make hair look incredibly sexy. Hold a one-inch curling iron vertically, and wrap just the center of each section of hair—not the roots or ends—around the barrel for only a few seconds. (Any longer and the curl will get too tight.) When finished, flip your head upside down and lightly skim a paddle brush over the curls to break them up. Shake curls around with your fingers before bending back up. 14. Wear Hair Halfway Back
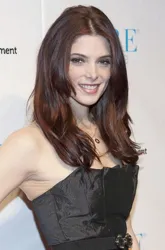
To make this style more grown-up, take the top section of your hair from temple to temple and lightly tease the underside with a paddle brush. Skim the brush over the surface of hair to smooth it, then secure at the back of the crown with a simple metal or tortoiseshell barrette. 15. Get Big, Bouncy CurlsNothing says "bombshell" like a flowing heap of curls. Apply mousse throughout damp hair, followed by a little serum on the ends, then blow-dry without a brush. Use a one-inch curling iron to roll hair sections up, from the ends to the scalp, and hold each there for a second. After sliding out the iron, pin the curls to the head. When they've cooled, release the curls and fluff them with a brush. 16. Add Color
It's the fastest solution to a bad hair day. Choose a square, printed scarf (solid colors tend to look like a bandage) and fold it in half diagonally to make a triangle. Tie it over the top of your hair and knot it in back. The front should rest no more than an inch down over your hairline (any lower, and you risk Axl Rose comparisons). 17. Create a Rounded BlowoutThink Michelle Pfeiffer in Scarface. With a slinky dress, this is still a seductive look for shoulder-length hair. Blow-dry hair straight with a round brush, then make a deep side part. Wind the ends around large hot rollers and leave them in until they've cooled. After taking out the curlers, gently brush through the ends, then rub a drop or two of shine serum between your palms and smooth them over your hair. 18. Bump It Up
Build a small amount of height at your crown adds a whole lot of sex appeal. For the classic sex kitten look, blow-dry hair with a round brush, then set it in hot rollers to amp up the volume. After taking out the rollers, part hair in the middle, then lightly tease the underside of the crown with a fine-tooth comb to give it a bit of lift. Skim a paddle brush over the surface of your crown to smooth any fuzz. 19. Do a Relaxed TwistGone are the days when the French twist must be neat and tidy. A slightly wet-looking texture and roughed up finish makes it young and cool. On air-dried hair, work a shine spray or serum from an inch below the roots to the ends. Comb hair back with your fingers without pulling it taut, then roll into a French twist and pin haphazardly. Don't worry about a few pieces falling out—they'll only enhance the look.
20. Start a Ripple EffectRippled waves on hair that's shoulder-length or shorter look elegant without seeming too retro. Work a quarter-size drop of serum through damp hair and air-dry. Roll just the front sections with a 3/4-inch iron (curling all the hair can make it poufy), then immediately run a wide-tooth comb through to make loose waves. 21. Get CenteredTry switching your part to the middle—it not only gives your cut a new shape, it also evens out volume. A center part looks best with hair that has a little body, so if yours has fallen flat, twist it into a low bun and mist just the bun with a texturizing spray. After 20 minutes, let down your hair and tousle it around with your hands. 22. Build Tousle Into The Front Of Your HairlineA little dishevelment in the front keeps an updo from looking rigid. Gently tease your hair with a paddle brush before wrapping it up into a bun or twist. Then, use the pointed side of a rattail comb to loosen the front—slide it vertically into the side of the hair, then gently tug the hair away from the scalp ever so slightly. 23. Go Platinum
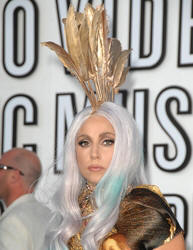
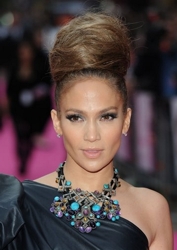
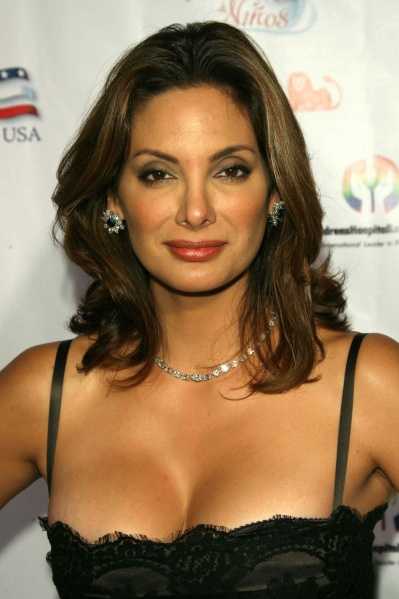
Yes, it's a bold color choice. But platinum blonde is having a resurgence, and on women with fair skin, it's a cool, almost otherworldly look. If you have yellowish skin, ask your colorist for ashy platinum. If you're pinkish, you need a little gold in your hair. And because bleach is tough on hair, platinum is best for cuts that are shoulder-length or shorter. A weekly deep-conditioning treatment at home is almost a must Use the point to lift out a few pieces at your hairline so they softly drape around your face. 24. Be a Radiant BrunetteTo make brown hair even more lush, try going one shade darker than your natural look to a rich chocolate or chestnut color. If your color is almost black, though, warm it up with a few chestnut or caramel highlights. When doing allover color on brunette hair, ask your colorist to skip the ends, which are more porous, and instead apply a tinted gloss treatment on them. Otherwise, the ends can absorb too much dye and look darker than the rest. 25. Decorate Your UpdoA jeweled barrette dresses up hair that's been gathered back. Fasten the clip just above a high bun or knot, slightly off center at the crown. With a low chignon, place the clip in the hair just above the bun—or, if the barrette is delicate, stick it near the front of your head, lining it up above the arch of one eyebrow.
26. Add Instant ColorPart hair on the side, then slide a colorful bobby pin in on the opposite side at the spot that lines up above the end of your eyebrow. Then, slide another pin of a different color right above the first one. 27. Add A FlowerA floral hair clip instantly changes up any updo. Hair flowers are very sweet and dreamy. To keep it from looking juvenile, stick with a soft-colored one. Place it on the side of loose hair just above the ear, or tuck it right above a low bun. 28. Clip On A FeatherA feathered haircut is outdated. But a feathered hair clip looks striking for evening. Stick with black feathers place the clip on the side of your head, close to your face. 29. Bend Your Ends
The cheater's method to bouncy hair? Just add a few chunky waves on the ends. Hold a one-inch curling iron vertically and wrap inch-wide sections of hair around the barrel from the chin down without clamping the iron shut, leaving the bottom two inches hanging out. Loosen the waves by brushing gently. 30. Move Your Bun A Few InchesWhat a difference an inch makes. By placing the classic ballerina bun slightly askew, the style suddenly looks fresh and young. Just be sure to pin it low on the neck and no more than an inch or two off-center—any more is too Princess Leia. 31. Create Billowy WavesTo create soft finger waves, it's worth buying a triple-barrel curling iron Simply clamp it along dry hair, starting about three inches below the roots. Twist each waved section around your finger, and clip it to your head. When all of your hair has cooled, let it down and gently brush through the waves to soften them. 32. Get LoopyPolished hair doesn't have to be prissy. Try offsetting a sleek crown with a voluminous bun. Blow-dry hair straight, make a side part, and pull hair back into a tight, low ponytail. Spritz the tail with hair spray and begin to wind it into a bun, but stop after one loop and pin the ends under the elastic. It coats the strands so they're matte and separated without being greasy. 33. Be a Tease
Teased waves mimic that just-off-the-beach texture. If you have naturally wavy hair, work a little leave-in conditioner through damp stands and let them dry naturally. If you have straight hair, use a one-inch-barrel curling iron to create relaxed curls. Then, on either hair type, mist texturizing spray all over to make the hair slightly gritty, and use a paddle brush—not a comb—to gently tease it. 34. Keep It NeatFor a bun that's neat but soft, skip the shine products. They can make smoothed-back hair look shellacked. Instead, use an aerosol hair spray to help strands stay in place. Do a light mist all around your head, then make a deep side part (or no part at all) and brush hair back into a chignon. Start about an inch above the ends and work your way up, stopping a few inches from the roots. 35. Play With BraidsBraids are a hot option for all hair regardless of hair length, type or texture. A high, fuzzy braid looks cute yet stylish. Start at your crown, and plait the hair tightly all the way down. After securing it with an elastic, tug along the braid's sides to loosen it slightly. This softens the style, but keeps the braid intact. 36. Extend Yourself
Clip-in hair extensions not only deliver length, they also make fine hair appear thicker. The kind that increase length are wide, stretching from about ear to ear with several clips along the seam. Here's how to put them in: A. From crown to nape, divide hair into about six ear-to-ear sections, and gather each into a barrette. Leave an inch of space in between sections for thick hair and two inches in between for thin hair. B. Starting at the nape, take one section, tease hair at the roots, and spritz with hair spray. Fasten the fake hair in place to the scalp as close as you can. Repeat this process with each section until you reach the crown, then check in the mirror to make sure there aren't any visible lumps where the clips are (if so, take out that piece and redo it, making sure there's at least an inch-wide section of your natural hair above it to conceal the clips). 37. Create Major VolumeBody building is a cinch with these steps: 1. Apply a volumizing mousse throughout damp hair. 2. Remove the nozzle from your dryer. Flip your head upside down, and blow-dry while running a vent brush through hair. 3. When hair is almost dry, flip your head up and finish drying with a medium-size round brush. 4. Working in small sections, lift your hair off your scalp with your fingers as you aim the dryer, set on cool, at your roots—this roughs up the cuticle to add volume. Do this all around your head, then lightly smooth hair with a brush. 38. Get Rumpled
Shaggy waves are so easy to create, you don't even need a brush. Simply mist damp strands with a volumizing spray and toss your hair around with your hands while blasting it with a blow-dryer. Once hair is dry, wrap just the middle section of inch-wide pieces around a large-barrel curling iron. When finished, shake it all up with your fingers. 39. Give Yourself a Smooth BlowoutUsing a blow-dryer rather than an iron to straighten hair creates a softer, more natural look. First, blot excess water with a microfiber towel. Then remove the dryer's nozzle and sweep damp hair from side to side with your fingers while blasting it; do this until hair is almost dry. Reattach the nozzle and, working in three-inch sections, pull each one out to the side using a paddle brush—keep your thumb on top of the bristles to help tightly pull the hair smooth all the way through to the ends. Run the dryer up and down each section until dry. 40. Add A Bang
Bangs are big and can completely alter a look. If you don't want to cut them to avoid the hassle of growing them out, consider an instant clip on version. SummaryWhen it comes to finding a sizzling hot hairstyle to wear to Prom, always consider the following factors: 1. The focal point of your gorgeous Prom gown. Do you want to highlight a stunning low cut back or a gorgeous beaded, runched or jeweled neckline? Always select a hairstyle which complements your gown rather than competes with it. 2. What is your overall Prom look? Are you going with a classic, edgy, romantic or other look? 3. Are you doing your hair at home or going to a stylist for your Prom do? 4. What is your prom hair budget? Does it allow for extensions or other add-on hair options? Social Media Network InformationPlease follow me on Twitter at: http://Twitter.com/HairBoutique. I look forward to meeting new Visit us at Hairboutique.com located at: http://www.HairBoutique.com, on Facebook, MySpace and YouTube. Please favorite us on Facebook. Thank you for visiting us at The HairBoutique Blog and for leaving your comments. They are very much appreciated. We apologize in advance but must remove any direct advertisements or solicitations. - Revised Publication Date: 04/23/11
| ||||||||||||||||||||||||||||||||||||||||||||||||||||||||||
| If you want to talk more about this or other hair care articles on HairBoutique.com or anywhere else, please post a message on HairBoutique.com's Hair Talk Forums.
|
Please follow us on Twitter at: https://Twitter.com/HairBoutique. I look forward to meeting new people from all walks of Twitter and learning from their Tweets.

