 OK, no need to confess. You've waited until mere days, even hours, before your Prom and you still have not decided how to do your hair.
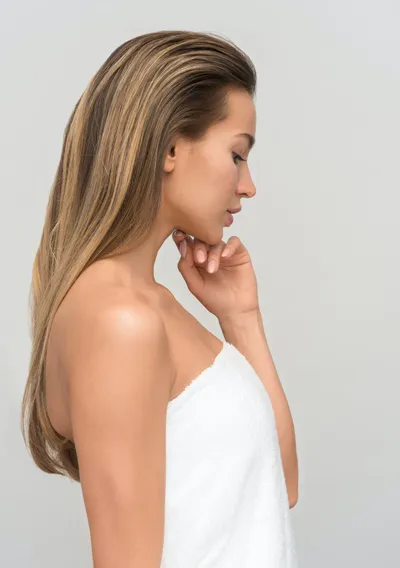
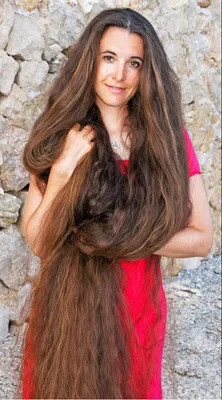
 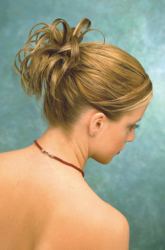 Although this updo works best on hair that is medium in length, it can work on any hair that is long enough to be pulled back into a full ponytail. Although the optimal length is for shoulder length tresses, the style can be modified for hair that is longer.


Wanna talk?
HairTalk® is the place for you!
Copyright 1997-2025, hairboutique.com, All Rights Reserved.

Introduction
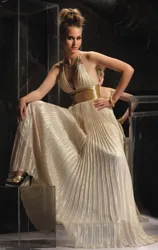
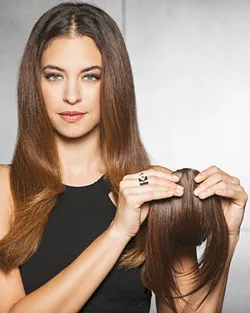
A last minute frantic dialing of local hair salons has uncovered the glum, but predictable fact, that all the salons have been booked for Prom many weeks in advance. (Photo from Tom Carson - all rights reserved). So what are you to do? If you can draft a friend or loved one with hair talents, you are in saved. If not, you may have to wing it. Don't worry, you're in luck. This updo was specifically selected because it can be created on pre-washed, dried and straightened hair in just about 10 minutes. This updo is flirtatious, fun and easy to style all by yourself. The style works perfectly with just about any type of neckline or Prom fashion and style. Ideal Hair Length, Texture & Type
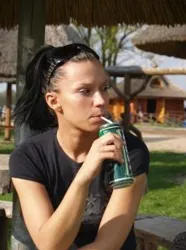
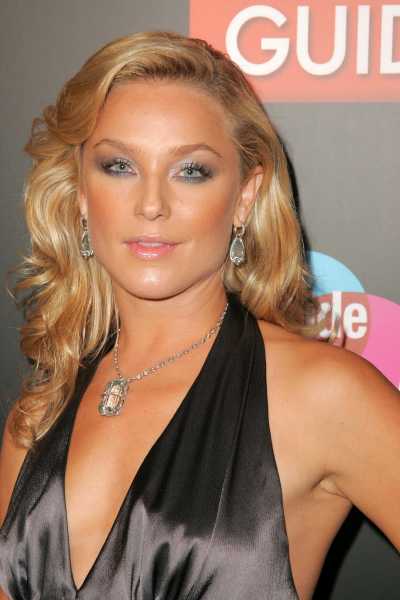
The model is wearing bangs that are swept to one side and pinned close to the head, If you prefer, full bangs can also be worn with this style. This sassy style works best on strands that are naturally straight, chemically or temporarily straightened. If your own hair is tightly curly or extremely wavy, you may want to rethink this updo as your ideal style.
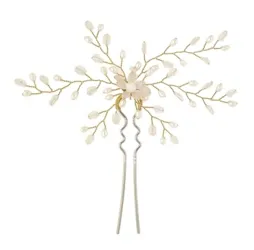
Before Your StartThe style was created on previously washed, dried hair that was “aged” so that the hair’s natural oils had time to build up slightly. Natural hair oils help the updo hold tighter and last longer. Keep in mind that freshly washed hair may be overly soft and slippery, making it challenging to style, which would add time to the creation of this updo. If you prefer to work with newly washed hair limit your use of conditioners or other products that make strands slippery soft. Before you start make sure that you have all the proper tools including plenty of hairpins, a good brush and comb. If you wish to add hair accessories be sure you have them ready to be added to the style at the end. Remember to use good styling creams, gels, sprays or similar products to give hair instant texture and stylability. While less may be more, when it comes to creating dressy updo related styles, too little may not enough. Step By Step Instructions1. Begin by using a soft boar’s head brush or similar natural bristle brush to make sure that all knots and tangles are completely removed from all strands. 2. Working from side to side with individual sections that are about 1 to 2 inches in thickness, smooth all of the hair with a hot flat iron. Allow hair to cool completely before proceeding. Use Robert Hallowell’s Super Volumizing Tonic and spray each individual section lightly. Then run a traditional or ceramic barreled flat iron through the tresses to straighten. After you run the iron through each section the “hair will get sort of crunchy and flat, flat, flat” according to Robert. If you elevate each piece high above the ears while ironing it you will achieve a super straight effect with lots of volume on the ends, which is one of Robert’s straightening secrets that he uses on his many celebrity clients. Note: Super Volumizing Tonic is actually very good for your hair because it contains no alcohol and lots of Vitamin B. It also adds instant shine and manageability. 3. Using a rattail comb or brush, part off a section of fringe hair from the rest of the crown section. Clip out of the way. 4. Using your hands in conjunction with a comb or brush, gather a small section of hair approximately 4 inches in thickness at the top of the crown in the back section. 5. Hold the ends of the new section straight out from the scalp with one hand. Use a fine-toothed comb or small brush with the other hand to backcomb the hair towards the base in sharp sweeping strokes. 6. With the other hand, run the comb down the length of the hair from the end towards the scalp in short sharp strokes. Continue to backcomb the section until the desired volume is achieved. Spray this teased section with a firm hold hairspray. Note: Backcombing should only be done for special events since the teasing of tresses can be stressful or potentially damaging for the ends. 7. Once the first section is completely teased, pick up the next section of hair and repeat the process until all of the back hair has been completely backcombed. 8. Use a firm hairspray to completely spray all of the teased hair. 9. Using both hands carefully smooth the teased hair making sure there is fullness and height at the crown. 10. Brush hair smoothly back from the hairline. Using your hands in conjunction with the brush, gather the back section of hair up into a mid-back ponytail making sure that the top section of the crown is pushed up to maintain maximum fullness and volume. 11. Secure the ponytail with a “hair friendly” Blax, Bungee or other elastic band. The gathered base of the ponytail should rest approximately 6-8" up from the base of the head. 12. Starting at the top of the ponytail near the base, lift a 1-2” thick strand of hair from the newly formed ponytail. When in doubt use thinner rather than thicker strands that give a "ribbon" effect. Backcomb lightly to get a firmer texture to the ribbon strand. 13. Using your fingers or a round brush, carefully form a smooth open loop around your fingers. For extra hold, use a good setting gel like Phytofix or similar, to prepare each chunk of hair before forming the ribbon loop. To add extra volume to each curled section, use Phytovolume Actif Spray or Robert Hallowell’s Super Volumizing Tonic and spray each individual section lightly before looping. 14. Position the newly formed loop against the scalp and anchor at the tail section with bobby pins in the same color as the hair. 15. Spray the first loop with firm hold hairspray. 16. Working in a uniform direction from the top of the pony towards the bottom, continue to form a series of 1-2” loops that nestle softly into each other in a well-balanced circular formation. If desired, pin a few of the loops near the middle section of the strand allowing a “tail” to protrude freely from the curled configuration creating a flirty splay of hair. Or make the loops pronounced so they spike up slightly against the back of the crown. Note: The key to this look is uniformity. Strive to make all the loops the same size and tightness. Experiment with the number of loops that are created. Also experiment with crossing strands over or under other strands to get a fuller look. 17. When all the loops are completely formed and arranged, spray well with a strong hold hairspray. 18. Release the fringe area. Lightly backcomb, spray and pin into a side swept position against the forehead. 19. 20. Attach any desired hair accessory. Remember to always attach accessories last after all styling products have been applied to avoid damaging delicate accessories. Finishing TouchesThis updo style is free and easy but can morph from casual chic to over the top elegance with the addition of accessories.
The beauty of this easy updo is that it can scale up or down depending on your fashion or whims. |
| If you want to talk more about this or other hair care articles on HairBoutique.com or anywhere else, please post a message on HairBoutique.com's Hair Talk Forums.
|
Please follow us on Twitter at: https://Twitter.com/HairBoutique. I look forward to meeting new people from all walks of Twitter and learning from their Tweets.

