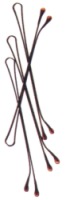
 You will need the following hair tools to create the look:


Wanna talk?
HairTalk® is the place for you!
Copyright 1997-2025, hairboutique.com, All Rights Reserved.

Introduction
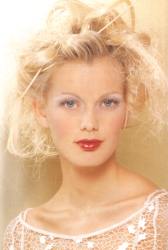
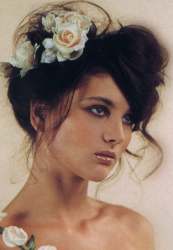
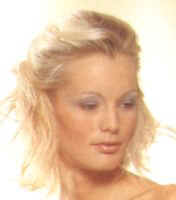
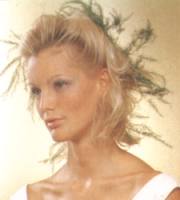
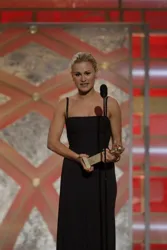
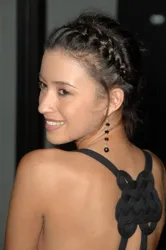
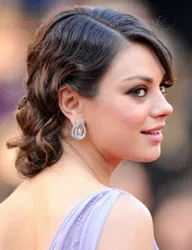
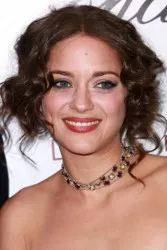
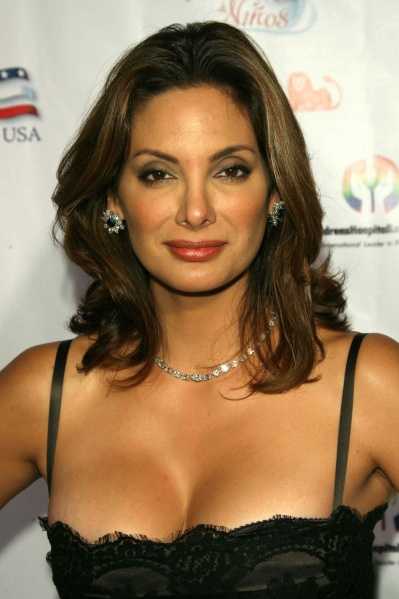
Messy buns come and go but a version of them always remains popular. The "undone" updos and buns were very hot on the 2000 runways, They were changed to be a little bigger and a little more creative, but have remained hot for years. Why? The look is so incredibly versatile that it can be designed to be up-to-the-minute in style. It's also easy. What could be more fun that making a mess? Messy updos and buns are also incredibly soft and pretty and can be customized with hair jewels, hair sticks, ribbons, feathers, flowers or just about anything that grabs your fancy. The messiness scale can swing from a few messy stands to a full blown mega-messy look. The look works for Prom, formal events and weddings. Any face shape can carry off this look. Hair that is chin length or longer can easily be molded into a variety of messy styles. Steps For Creating Messy Updo
The updo styles shown in this article are soft, sensuous and can be worn by anyone with chin length hair or longer. With practice you should easily be able to do this look at home. For a more polished look that is uniquely yours, work with your stylist. This style is best suited for medium to longer hair, but can be modified to be worn by women with very long locks. Any face shape can look good in this style. The style is flexible and allows for some facial shape compensate. You can modify the style by adding or removing bangs, adding parts or adding appropriate height and fullness to the style. Getting Started: This look works best with "day old" hair. Freshly washed hair may be too soft to hold your style. If your hair is naturally thick this style is a natural look. To get the same look with thin or fine hair be sure to use volume enhancing shampoo and gel before attempting this look.
1. Bobby pins that match your hair color. 2. A hair-dryer that has a diffuser attachment. 3. Hair gel or mousse. A gel or mousse product would be ideal. 4. A good styling comb and brush. 5. "Hair friendly" elastic bands to match your hair color. 6. Hair jewelry, headbands, flowers, feathers or other desired adornments. 7. Shaping/styling spray product. 8. Shine product. Step 1: Carefully brush or comb your hair to remove all knots or tangles. Apply a dollop of gel or mousse from the palms of your hands to your hair. Comb completely through your hair. Your hair should be slightly damp from the gel mousse that you apply. If you need extra fullness for your style concentrate volume enhancing gel or mousse at the roots. PhytoVolume Actif or a similar product can be applied to add maximum lift. Step 2: Using a comb carefully divide your hair into 6-8 equal sized sections. Separate each section, twist carefully into a tight knot and clip to hold the hair in place. Note: You can experiment with more or less sections to get different looks. Step 3: Attach the diffuser to the hair dryer and then blow dry your hair until it is completely dry. The amount of time you dry your hair will depend on the length and thickness of your hair. Make sure your hair is completely dry before you finish.
Step 4: Let hair cool completely. Carefully undo the clips holding the hair twists in place. Step 5: Using your fingers carefully ruffle your hair to get a messy full look. To add more volume you can bend over at the waist and carefully finger pick your hair. Step 6: Carefully brush your hair back to form a soft ponytail that is very high at the crown of your head. Before attaching an elastic band, pull two hair strands loose on either side of your face. Step 7: Attach a "hair friendly" elastic band to the ponytail hair. Make sure that the ponytail rests high on the crown so that you can wrap it into a bun. Step 8: Take the ponytail and wrap it loosely into a soft bun turning the hair clockwise. Once you have the shape that you like carefully pin the bun into place.
Step 9: Take the ponytail and wrap it loosely into a soft bun turning the hair clockwise. Once you have the shape that you like carefully pin the bun securely into place. Step 10: Take the loose hair on either side of your face and twist softly into loose knots. Pin the knots up around the ponytail. Or you can leave the strands to hang freely. Note: Remember that creation of any updo style often requires some practice. As each style is created pay attention to areas of difficulty that you can refine and simply. Remember that practice makes perfect. Step 11: Using the tail of a rattail comb or your fingers, carefully pull strands of hair loose from around the bun until you have the messy look you desire. If the strands are long you can lightly backcomb them and pin them softly into random looks around your crown. Remember that the key is messy and soft. Step 12: When you have the style the way that you like it and you have added all appropriate hair accessories, spray with a good setting product to hold the style. Summary
You may want to add a tiny drop of shine product to the palms of your hand to smooth along finished look to add killer shine to your do. You may also want to dress up the style by pinning one or more flowers into the style. Or you may want to add a few well chosen rhinestone hair clips or magnets. Another option is to add a touch of glitter around the part. This style is perfect for gorgeous hairsticks that can be added as accent pieces to really dress up the style. Use two or more sticks angled around the base of the ponytail to create a unique and very contemporary look. You can also take a curling iron and carefully curl the front strands that frame your face to give the ends a soft curl. Although this style was designed without bangs, you can also add a fringe if you like the look better. For a wild look, consider pinning feathers, branches or brightly colored artificial hair strands throughout the style to give it an unusual look. Other options are to create a zig zag part near the front. This style looks especially stunning on hair that has been highlighted. The loops can be strategically created to take advantage of different hair colors and hues. The advantage of this great style is that you can play with it to create the exact unique look that is all your own. | |||||||||||||||
| If you want to talk more about this or other hair care articles on HairBoutique.com or anywhere else, please post a message on HairBoutique.com's Hair Talk Forums.
|
Please follow us on Twitter at: https://Twitter.com/HairBoutique. I look forward to meeting new people from all walks of Twitter and learning from their Tweets.

