Do It Yourself Party Hair
Introduction
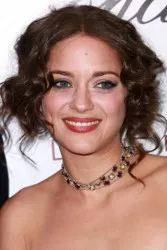
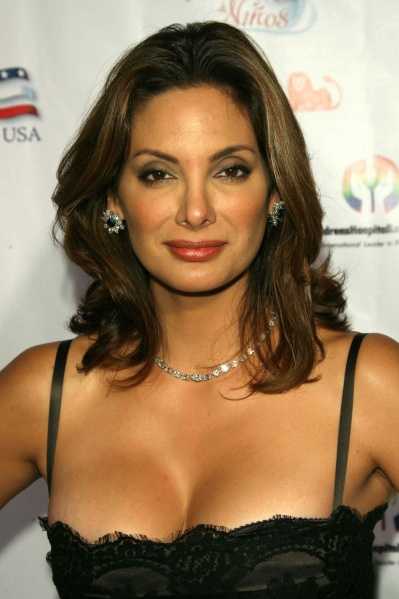
(Photo from Tom Carson & MultiMedia International - all rights reserved). The freedom to flow with your own hair means that updos are morphing into a dizzying array of optional styles. Whether you want a traditional curled style or want to funk it up with spikes, tousles or free form hair tails you will be right in style. Creating your own spectacular party hair can be easy if you are willing to experiment and practice some styles before your big night. It also helps to have great mirrors that you can view all sides and the back of your hair for easy styling. Whether you are going to a Prom, Wedding, black tie party or walzing down a red carpet, you can do your own styles. After all, Jessica Simpson often does her own hair. Jessica Simpson Does Party HairDid I say Jessica Simpson the uber famous star of MTV's Newlyweds? Yes indeed. In fact, I was recently chatting with Jessica's famous hairdresser, Ken Paves and he gave me the scoop. Although Ken often travels with Jess to do her hair for major celebrity happenings, sometimes he just can't be with Jessica. On those occasions Ken and Jessica plan in advance how she will do her own strands. At Jessica and hubby Nick's recent appearance at the 2004 Kentucky Derby her beautiful blonde strands were coiffed by her very own hands. Later that evening Jessica appeared in a sleek and sultry updo that she fashioned herself with some previous practice with Ken. Although this updo may be a little complicated for some of you, the option to simplify the style if always yours. If you want to crank up the style considering asking a friend or your hairdresser to help.
Ideal Hair Length, Texture & Type
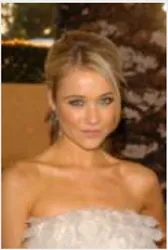
(Photo from Tom Carson & MultiMedia International - all rights reserved). The model is wearing long bangs that are swept to one side and pinned off the forehead. If you prefer, full bangs can also be worn with this style. This romatnic updo style works best on strands that are naturally straight, chemically or temporarily straightened. If your own hair is tightly curly or extremely wavy, you may want to rethink this updo as your ideal style. Before Your Start
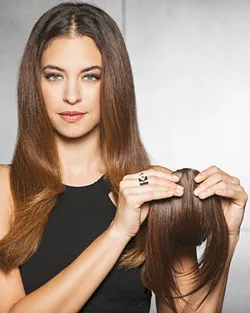
(Photo from Tom Carson & MultiMedia International - all rights reserved). Keep in mind that freshly washed hair may be overly soft and slippery, making it challenging to style, which would add time to the creation of this updo. If you prefer to work with newly washed hair limit your use of conditioners or other products that make strands slippery soft. Before you start make sure that you have all the proper tools including plenty of hairpins, a good brush and comb. If you wish to add hair accessories be sure you have them ready to be added to the style at the end. Remember to use good styling creams, gels, sprays or similar products to give hair instant texture and stylability. While less may be more, when it comes to creating dressy updo related styles, too little may not enough. Step By Step Instructions1. Begin by using a soft boar’s head brush or similar natural bristle brush to make sure that all knots and tangles are completely removed from all strands. 2. If your hair is naturally curly or wavy you will have to flat iron or straighten your hair for this style. If your hair is naturally or already straight, skip to Step 3. If you need to straighten read the directions below. Working from side to side with individual sections that are about 1 to 2 inches in thickness, smooth all of the hair with a hot flat iron. Allow hair to cool completely before proceeding. Use Robert Hallowell’s Super Volumizing Tonic and spray each individual section lightly. Then run a traditional or ceramic barreled flat iron through the tresses to straighten. After you run the iron through each section the “hair will get sort of crunchy and flat, flat, flat” according to Robert. If you elevate each piece high above the ears while ironing it you will achieve a super straight effect with lots of volume on the ends, which is one of Robert’s straightening secrets that he uses on his many celebrity clients. Note: Super Volumizing Tonic is actually very good for your hair because it contains no alcohol and lots of Vitamin B. It also adds instant shine and manageability. 3. Using a rattail comb or brush, create a vertical part that extends from in front of one ear to the other. After you have created the new part you should have two sections of hair, a front and a back section. Part off the front section and any fringe hair from the rest of the crown section. Clip out of the way. 4. Using your hands in conjunction with a comb or brush, gather the back section of hair up into a tight ponytail that rests in the middle of the back of the head. Secure the ponytail with a “hair friendly” Blax, Bungee or other elastic band. The gathered base of the ponytail should rest approximately 6-8" up from the base of the neck. Note: Be sure to tighten the ponytail and smooth all loose strands. Adjust the base of the ponytail up or down the back of the head to allow for how high you wish the style to sit. For longer hair move the base of the pony up closer to the middle of the head to allow for extra bulkiness of the hair. For medium hair, position the base of the pony so that is sits lower. 5. If your hair is not full enough to create a full array of curls, consider adding a clip-on ponytail or clip-on curls and blending them into the newly created pony. If your hair is full enough to support enough curls to give an array of ringlets separate the ponytail into many 1 inch sections. 6. Using either a 1" barrel curling iron or 1" hot rollers, start around the perimeters of the ponytail and curl each individual 1" strand of sectioned hair. After you curl each strand, pin the new curl carefully into place to allow the new ringlet to cool. 7. Once all of the sections have been curled and pinned into place to cool, spray the entire area with a firm hairspray. 8. Carefully unpin all the curls. 9. Starting in the middle of the ponytail and working in a uniform circular pattern, use your fingers to form soft rounded 1/2" to 1" barrel curls. Pin the curls into place using bobby pins the same color as your hair. Leave the perimeter hair unpinned until the end. 10. After all the curls are pinned securely into place except for the fringe strands, spray again with a firm hairspray. 11. Working in a uniform direction from the top of the pony towards the bottom, continue to form a series of 1-2” loops that nestle softly into each other in a well-balanced circular formation. If desired, pin a few of the loops near the middle section of the strand allowing a “tail” to protrude freely from the curled configuration creating a flirty splay of hair. Or make the loops pronounced so they spike up slightly against the back of the crown. Position the newly formed loop against the scalp and anchor at the tail section with bobby pins in the same color as the hair. Note: The key to this look is uniformity. Strive to make all the loops the same size and tightness. Experiment with the number of loops that are created. Also experiment with crossing strands over or under other strands to get a fuller look. 12. Once the back of the hair is completely pinned to your desire, unclip the front section of hair. Lightly backcomb, spray and pin into a side swept position against the forehead. 13. 14. Attach any desired hair accessory like crystal encrusted or Retro design barrettes, jeweled bobbypins, hairsnaps, hair sticks or tiny hair clips. Remember to always attach accessories last after all styling products have been applied to avoid damaging delicate accessories. Finishing TouchesThis updo style exudes pure romance. Don’t be afraid to crank up the romantic appeal with gorgeous finishing touches ranging from silk flowers to Swarovski or pearl encrusted barrettes. Keep in mind that when this hairstyle is created according to the instructions, it might work best with a simpler gown that does not compete with your gorgeous updo style.
Go for an over the top elegant look by adding Austrian or Swarovski crystal hairpins, necklace and earrings. The beauty of this easy updo is that if you wish, you can scale it up or down depending on your whims. |
| If you want to talk more about this or other hair care articles on HairBoutique.com or anywhere else, please post a message on HairBoutique.com's Hair Talk Forums.
|
Social Media Network Information
Please follow us on Twitter at: https://Twitter.com/HairBoutique. I look forward to meeting new people from all walks of Twitter and learning from their Tweets.


 Today more than ever hairstyles break all boundaries. Depending on your own personality, the image you wish to portray, the fashions you are wearing or your mood, you can wear your hair just about anyway that your heart desires.
 Although this updo works best on hair that is medium in length, it can work on any hair that is long enough to be pulled back into a full ponytail. Although the optimal length is for shoulder length tresses, the style can be modified for hair that is slightly longer.
  The style was created on previously washed, dried hair that was “aged” so that the hair’s natural oils had time to build up slightly. Natural hair oils help the updo hold tighter and last longer.


