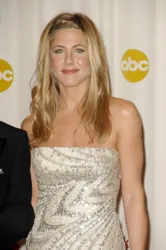
 Although our Friend Jennifer is known for her "Rachel" hairstyle that took the world by storm a few years ago, she has also had some other stunning styles that seemed to flash by without hardly a whisper.
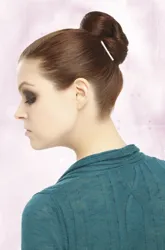
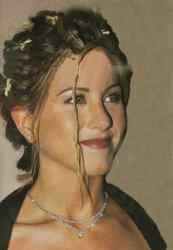 One of my own personal favorite Jennifer hairstyles was her "tied updo" look that was created for her by NYC master stylist John Sahag (now deceased).
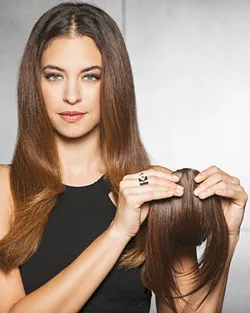
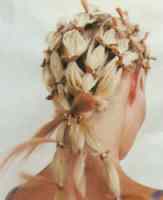 All you need is some imagination, some beautiful colored ribbon or string and a little help from a friend and this hot updo can be yours.
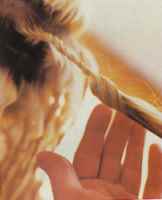 Apply
Apply 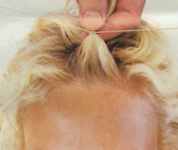 Step Three - Starting at your hairline, take one twisted hair rope strand at a time and tie the hair close to the root with a "hair friendly" elastic band.
 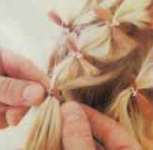 Step Four - Over each one of the elastic bands tie a five-inch piece of colored ribbon, string or rope.
 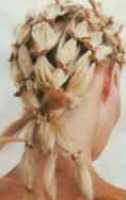 It will probably be difficult if not impossible for you to create this updo yourself. It will require help from a stylist or a friend.
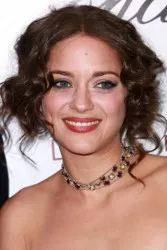
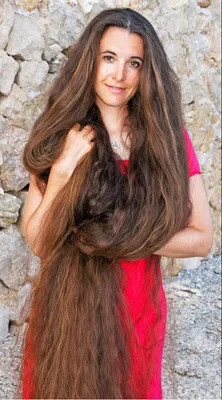
 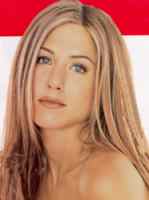 Jennifer's updo style can work for any hair that is medium to super long in length. Jennifer currently has bra length hair that tends to be naturally curly and wavy.
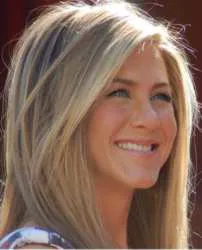


Wanna talk?
HairTalk® is the place for you!
Copyright 1997-2025, hairboutique.com, All Rights Reserved.

Introduction
Her look for 1999 have been a much longer, grown out "Rachel" that is straight, sleek and hugs her face. For a change of pace Jennifer has been known to "dress up" her hair with a modified type of dreadlocks or a twisted ropelike variation.
InStyle Magazine graciously provided some step-by-step details and photos of how to re-create Jennifer's updo which first appeared in 1998. Like everything with Jennifer Aniston and her hair, this style became wildly popular with hair consumers. Her John Sahag created tied updo is a perfect style for the Christmas Holiday season and would work well as a "hot" updo for medium to very long hair. This style is a great updo because it will work on all hair textures from straight to curly, thin to thick. It also has the advantage of being partly up and well as partly down.
This Jennifer updo style (shown to the right) looks great with contrasting colors or one color. It can be dressed up by adding twinkly hair jewels such as rhinestone hair pins or other rhinestone jewelry. Instructions - Step By StepIf your hair tends to be very soft right after you wash it, you may decide that it is best to create this tied updo style on "day old" hair that is not newly washed. If you decide to wash your hair before creating the look, be sure to finish your shampoo process with a cool to cold water rinse to close the hair shaft and give you hair added shine. Step One - Towel blot your hair to remove excess water. Apply a good leave in conditioning product like Phytotheratrie's Phyto #7, Phyto #9 or similar hair detangler.
Blow-dry your hair on a cool, slow setting using your fingers to add texture. Step Two - Starting at the nape of your neck and working up slowly and carefully towards the crown, create ropelike pieces of hair all over your head by twisting your hair with your fingers. To hold the newly created ropes in place you can loosely pin them with hairpins. If your find the hairpins are troublesome, leave the twisted ropes loose. In the original instructions provided by Sahag a curling iron was given as an option to create the twisted hair ropes. You can actually use a 1/2 to 1 inch curling iron to create the twisted pieces. If you do decide to use a curling iron it is important to be very careful to avoid getting your hair tangled or wrapped around the iron.
It is important that you do not use rubber bands or any clasps or bands that will tear or damage your hair. You can make the sections anywhere from 1/2 inch to 2 inches in thickness depending on how many sections you want to have and the final look you are trying to achieve. Experiment with different sizes of hair thickness until you find a perfect size for your hair sections.
You can also use yarn or even fake hair or hair extension pieces. Tie each of the ribbons into a knot and then cut off the ends close to the knot. Move down the shaft of each section of hair and continue tying knots from the root of your hair to about 2 inches from the ends. Tie different amounts of hair in each section to avoid an overly structured or uniform look. Each strand of twisted hair, depending on how long it is, will have a variety of knots tied along the length of the hair. You can space the knots evenly on each strand or mix them up on each strand. It is up to you how far apart you space the ties. Allow for a "tail" of hair at the end of each strand so that you can tie all the pieces together at the nape of the neck (Step Five). Step Five - When you get to the nape of the neck pull all the pieces of tied hair into a ponytail at the nape of the neck and use on long ribbon, T-shirt strip, rope or other material to tie all the pieces of tied hair together. Let the ends of the ribbon hang down the back. Apply Phytodefrisant Serum, or a similar product for a finishing touch.
Allow 30-60 minutes for the creation of the style depending on how long your hair is and how many knots you decide you want to create. Once you have had your stylist or friend practice the style on your hair, it can be created faster each time that it is recreated. With any new style it is always important to take as much time as possible to assemble all the tools you will need for creating the style in advance. It is also important to taking the time to experiment and practice with different looks. It is best to do this as far in advance of a special event as possible. This advance practice gives you time to wear the style a few times, even if you just wear it at home, to get a feel for how the style works with your hair. You may decide that the knots need to be tied tighter, looser or in larger or smaller sections. You may also find the style is hard to keep in place. You can adjust the style based on your experience wearing it. This Look Can Work For Lots Of Hair Types
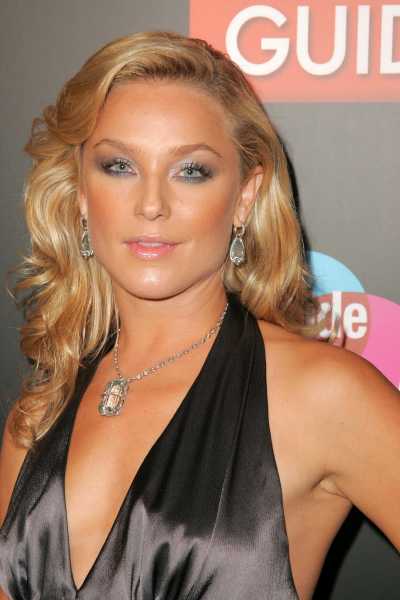
Curly hair and wavy hair can first be straightened using a temporary straightening product. Thin hair can be pumped up with a good volumizing shampoo. This hair style looks especially stunning on thick hair that has lots of contrasting colors that are emphasized with the tied hair pieces. The style can be worn in a variety of modified ways including wearing bangs, side tendrils or even leaving some hair loose to flow down the back. One of the advantages to this look is that it can be dressed up with velvet ribbon or dressed down with string or rope pieces. Face Shape Should Be ConsideredAs always you should take in consideration your natural face shape. Jennifer has a classic heart shaped face. Notice that her face shape is softened by the soft tendrils that fall on the sides and at the front of her face. The front of the hair is twisted so that the crown has added height which balances her face even more. Oval face shapes can easily wear this style. Round faces would benefit from side slimming tendrils that hug the face. Other face shapes can wear this hairstyle with minor modifications including adding some height or bangs or adding parts or loose curled tendrils. |
| If you want to talk more about this or other hair care articles on HairBoutique.com or anywhere else, please post a message on HairBoutique.com's Hair Talk Forums.
|
Please follow us on Twitter at: https://Twitter.com/HairBoutique. I look forward to meeting new people from all walks of Twitter and learning from their Tweets.

