


Wanna talk?
HairTalk® is the place for you!
Copyright 1997-2025, hairboutique.com, All Rights Reserved.

Introduction
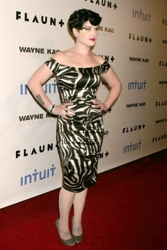
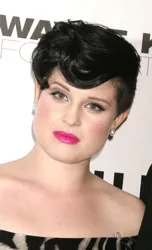
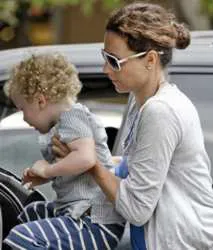
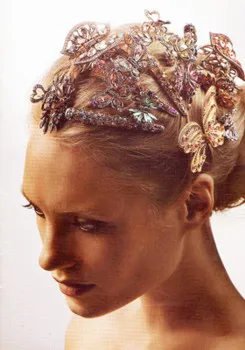
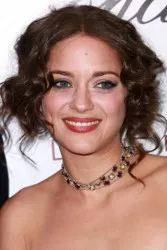
Pin curls were also quite popular at various times during the 40s, 50s and into the 60s. In fact, during the 40s, the pin curl set formed the foundation of most styles. Pin curls were used on all types, textures and lengths of hair but were especially popular for the shorter styles. With the current trending of curls and waves, don't be surprised to see pin curls making a major comeback lasting for a very long time. Celebrity Kelly Osbourne recently showcased a pin curl created hairstyle on the Red Carpet. It was pure glam.
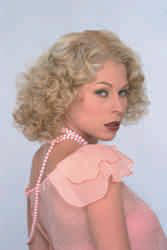
Pin curls have the advantage of being fairly easy to create after a little practice. They are also much easier to sleep on compared to the scratchy brush or large Velcro style rollers. Pin curls that are left in overnight create a longer and tighter set and they are good for a quick morning styling. When it comes to pin curls, there are several options which can be exercised to create completely different looks. The end results of a pin curl set depend directly upon the size of each curl that is created, how it is looped or curled and how it is pinned. There are basically two popular ways to clip a pin curl. You can clip them flatly to the head or you can clip them so that they are angled or standing up from the scalp. As you might suspect, this can create two different styles of curls.
Flat Pin Curls
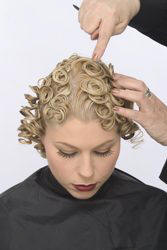
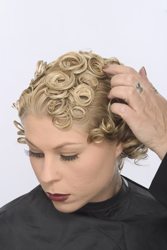
Listed below are step-by-step instructions for making a flat pin curl. 1. Start by using a comb with a rat tail or if you prefer, use a fine toothed comb. From personal experience I can tell you that creating pin curls can be difficult without the proper comb. 2. Using the tail of the comb create a clean, deep part in your hair. 3. Carefully section off a 1" inch section of hair for a medium sized curls. Section on a smaller section for tighter curls and larger sections for looser curls. 4. Comb the new section until it is completely smooth. 5. Spritz the section with a spray bottle filled with water or you can experiment with a hairspray or super volumizing tonic. 6. Hold the section of hair flatly against your scalp with one finger. 7. Take the end of the section and wind in a clockwise position around the opposite index finger forming a complete circle. Keep in mind that for the best style, form a round curl and not an oval one.
Note: Be sure not to twist the hair as you wind it. Make sure that the ends are tucked inside of the curl, and curl is pinned right on top of it natural hair base. Do not pin the curl away from the base of the curl. 8. Holding the end of the curl with the thumb of the same hand, slip the curl off the index finger letting the end naturally fold inward. 9. Continuing to hold the curl between the thumb and forefinger, finish winding it. Place it flat against the scalp. Clip it with a hair clip or two through the middle of the curl. Note: If you prefer, you can use more than one clip on each curl. When using more than one clip, crisscross the clips to form an X configuration. 10. Press against the curl to make sure that the ends don't escape. Note: You may wish to work with end papers available from most large beauty supply stores. 11. Once the curl is formed according to your desire, use a single or double pronged clip and slide it carefully over the newly formed curl to hold it in place. Note: Keep in mind that many people prefer the double prong clips for sleeping comfort. Under no circumstance should you use bobby pins which will form dents in the hair and may add to overall frizziness. 12. Make sure that the curl is anchored tightly by the clip, especially if you plan to sleep in the set overnight.
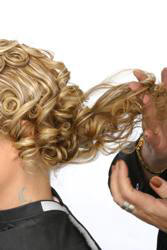
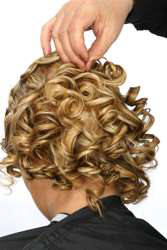
13. Divide and conquer. Work in a uniform pattern when creating the curls working from side to side and from top to bottom of the head. 14. Spray well with hairspray or styling spray. Sit under a hood dryer to set the style or sleep on the style overnight. When styling, unclip one curl at a time. Use fingers to arrange the curls in the desired style. Elevated Or Stand Up Pin CurlsIf you prefer to try the elevated pin curl, follow the same steps above as you would to create a flat curl. To create an elevated curl, anchor the finished loop with a single or double clip that is anchored on just one side so that the curl is slightly elevated from the scalp. The elevated curls will actually stand up from the scalp in little round loops held in place by one clip. Remember to create uniform and neat loops that are round and not oval. Additional Tips
Keep in mind the following additional pin curling tips:
If you have never created pin curls before, ask a friend to help you the first few times.
Other Options
If you're a beginner with pin curls or want to mix up the style a bit, experiment with mixing up different sets. Alternate between larger and smaller loops or working from different types of parts ranging from a center to a deep side part. Or set rows of pin curls alternating the direction of the curls clockwise and counter-clockwise. Consider placing the curls so that alternate between curling toward the front or towards the back of your face. Another option is to only apply pin curls to isolated sections of the hair or to just the top or just the bottom. By alternating the direction of the pin curls, your tresses will coil into beautiful deep waves when you remove the pins. Keep in mind that you can easily dictate the size of the waves by adjusting for the size of the curls. SummaryPin curls have the advantage of being fairly easy to create after a little practice. They are also easier to sleep in compared to the brush or large Velcro style rollers. | |||||||||||||||||||||
| If you want to talk more about this or other hair care articles on HairBoutique.com or anywhere else, please post a message on HairBoutique.com's Hair Talk Forums.
|
Please follow us on Twitter at: https://Twitter.com/HairBoutique. I look forward to meeting new people from all walks of Twitter and learning from their Tweets.

