Angel Hairstyles
Introduction
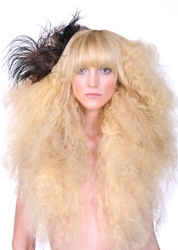
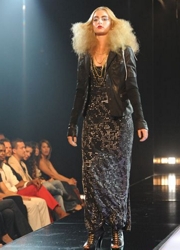
When the wildly talented Janine Jarmon unveiled her high fashion hair style designed to show off a designer bikini bottom on Bravo's Shear Genius Season 3, she referred to the hair as sea nymph hair. Others might refer to the hair, which had a halo effect, as being angel hair. Of course it can also be referred to as cotton candy hair or even a hair cloud. Take your pick. The celebrity hairstylist who has worked with a wide range of celebrities won the competition for creating hair to top the bikini bottom. Janine's unique hair style was created on a model who had long blonde hair extensions. To create a truly dramatic look, Janine left the model's fringe straight to offset the halo of blonde tresses. She also added a feather embellished hair accessory to also create a unique contrast. How To Recreate Angel HairAngel Hair can be created utilizing a variety of techniques ranging from setting newly cleansed and damp strands with straws, pipe cleaners, string, rags or Janine's method of utilizing open hair pins. Basically the brilliant hairstylist used a traditional pin set.
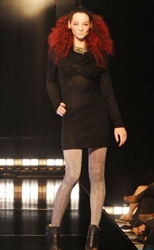
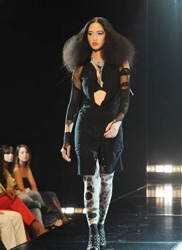
Janine's winning hair design for Shear Genius looks fluffy and airy. Her creation of this amazing hairstyle requires sectioning the hair into small 1/2 to 2" sections (depending on how full or big you want the hair to be) and then painstakingly wrapping them around the open hair pin. This halo hair created such a great reaction from fans, the Shear Genius judges and the media, Janine recreated the angel hair look for more than one of the competitions. She mixed up the styles by alternating the straight fringe with hair which billowed from a center part starting level with the top of the model's ear. Best Types Of Hair For Angel HairstylesIf your hair is fine, thin or tends to easily flatten you may wish to prep hair with a large barreled curling iron or hot rollers to add fullness. If you prefer you can add individual clip-in extension pieces to help add fullness to the hair. In theory Angel Hair can be worn by anyone of any age or race, but works best on hair which is shoulder length or longer. The styles displayed in this article were created on hair which is extends below the shoulders.
Step By Step
Complete these steps on pre-cleansed, completely dry strands which has been prepped with styling creams, gels or mousses as desired. If hair is newly washed then be sure to prep with styling spray or similar. To achieve the fullness and big halo of hair its important to either have extremely thick hair or utilize add-on hair extensions. 1. Use fingers or a wide-tooth comb and separate tresses into individual 2 inch sections. 2. Work on one section of hair at a time. Clip the rest of the hair out of the way. 3. Spray with hairspray or setting mist and comb through from the roots to the ends. 4. Take a 2 inch square section of hair from the scalp. Starting at the root section weave the section of hair around an open zig zag style hair pin. Weave the hair back and forth in a zig zag pattern. 5. After all the hair has been wrapped on the hair pins, use a hot flat iron and compress each individual section of hair for a few seconds to set each section. 6. All the hair to completely cool. 7. Pull the hair out of each pin one at a time.
8. Use a 100% boar bristle brush like a Mason Pearson to break up the newly formed zig zagged sections. The goal is to create a cloud of diffused texture. If desired backcomb target sections and use fingers to break the texture. 9. Finish with a spritz of very light finishing spray to avoid weighing down the halo of curls. Experiment with straws, rags or string to achieve a different texture. SummaryThere are a variety of ways to showcase newly created Angel Hair. It can be combined with a slightly beveled eyebrow skimming fringe or it can cascaded from a center part and billow out from the ears or below. You can also smooth the sides and direct the clouds of hair back into a ponytail. You are limited only by your imagination. Experiment with a range of hairstyles for different looks. Social Media Network InformationPlease follow me on Twitter at: http://Twitter.com/HairBoutique. I look forward to meeting new Thank you for visiting us at The HairBoutique Blog and for leaving your comments. They are very much appreciated. We apologize in advance but must remove any direct advertisements or solicitations. - Revised Publication Date: 05/21/11
| ||||||||||||
| If you want to talk more about this or other hair care articles on HairBoutique.com or anywhere else, please post a message on HairBoutique.com's Hair Talk Forums.
|
Social Media Network Information
Please follow us on Twitter at: https://Twitter.com/HairBoutique. I look forward to meeting new people from all walks of Twitter and learning from their Tweets.


