 Patrick Cameron is considered by many to be the
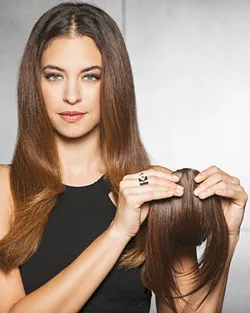
 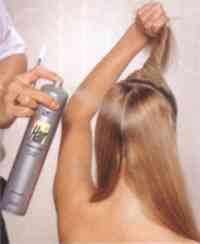 Patrick's Cordelia style is designed to work best for hair that is shoulder length or longer. Hair that is fine or thin may not adopt well to this style. Curly or wavy hair will need to be
 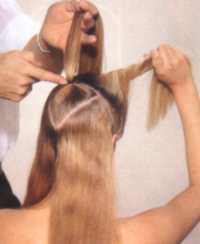 Step Two: Spritz with a good hair spray like Wella high Hair finishing spray,
 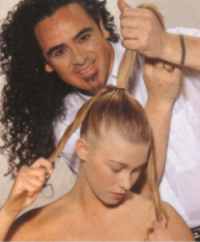 Take the first "center" ponytail and make a secondary or "sub" ponytail from the main ponytail. This will create a fourth ponytail that is created from the first and center tail. Keep applying hair spray as you work and remember to keep the "hair friendly" elastic and ponytail close to the scalp.
 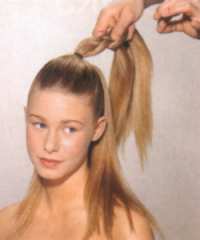 Divide each pony into three equal chunks of hair and do a simple three strand over braid. Remember to braid the loose nylon thread as part of the braiding process for each of the individual ponytails.
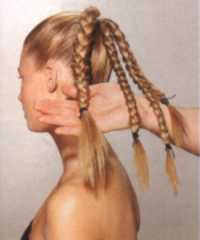 Step Ten: When you are finished braiding you will have four plaits, each with a longer piece of nylon thread still hanging down from the finished braid. Carefully push the braid from the ends towards the scalp while pulling gently on the nylon thread.
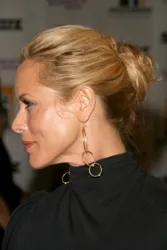
 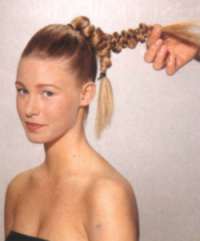 Step Twelve: Position each of the braids in place on your head with large pins or clips.
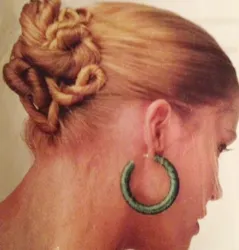
 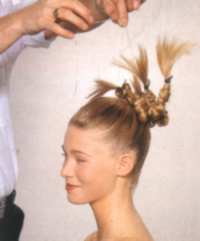 If you prefer wear this beautiful style without any adornments.
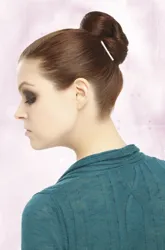


Wanna talk?
HairTalk® is the place for you!
Copyright 1997-2025, hairboutique.com, All Rights Reserved.

Introduction
Patrick has been a favorite of the HairBoutique.com since the very beginning. One of the first products that we sold in our original e-store was Patrick's long hair styling videos. Although we loved his two books, it was not practical to sell them at HairBoutique.com because of the cost to ship the books (which are quite heavy) from overseas. Whenever he has new photos, Patrick has been great about sharing them with us. His gallery here at HairBoutique.com demonstrates some of his best work over the past few years. The Cordelia UpdoPatrick's "Cordelia" style is a fabulous look for any party of special event like a Homecoming dance, Wedding Prom or dressy party. HairBoutique.com presents this fabulous style with special permission from Patrick's Dressing Long Hair 2 Book which is now available from Thomson Learning. Note: All photos included in this article are copyrighted by Patrick Cameron and may not be copied without express permission. For more fabulous long looks check out Patrick's long hair styling videos and books that are chock full of styling ideas.
Instructions
If possible, create this look on hair that is not freshly washed. Step One: Starting at the back of the head make a part right down the very center as shown in the photo above.
Step Three: Make the first of three high ponytails that are all the same thickness, size and position. Step Four: A "hair friendly" elastic or fabric covered hair band should be positioned as close to the scalp as possible to hold each of the ponytails in place. Step Five: Ease the ponytail down from the scalp when you are finished creating it. Try not to drag hair down. Repeat this process until you have three equal ponytails in size and position on the scalp. Step Six: Step Seven: Pull a piece of clear nylon thread (that is slightly longer than the ponytail) around the back of the ponytail. Carefully tie the nylon thread to the top of the ponytail where the hair is gathered by the elastic band. When you are finished you should have a piece of clear nylon thread tied around the top of each ponytail with a long strand of thread that actually extends beyond the length of each pony. In essence you will leave a long end dangling. It is very important to repeat this step on all of the 4 ponytails. The thread will eventually be braided into the plaits that will be created. Note: It is important to use clear thread since it will be part of the finished updo. If possible use dark thread if you have dark hair. Consider the color impact to your style before you select the thread. In most cases clear works best. It is ultimately best to not let the thread show through the style. Step Eight: Step Nine: Repeat this process one by one until you have braided all four of the different ponytails. All ends of each finished braid should be secured with "hair friendly" elastic or fabric bands to protect and close the ends from unraveling. If you prefer, select bands that match your hair color.
This will create a "scrunchy" type of effect on the braid and will draw them closely to the scalp. Step Eleven: Using the four different pieces of nylon thread, pull the "scrunched" plaits to an upright position along the scalp. The ends of the plaits should all be pointing upwards to the sky. Depending on how you created each braid you will have either a little or lot of "hair tail".
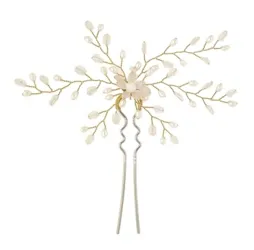
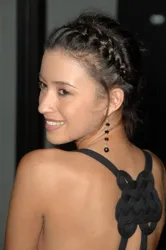
Carefully tuck away and pin the remaining thread ends from obvious view. Either pin down the "hair tails" for a smooth elegant look or tease them up for a more feathery look. Add a little styling wax for a more edgy look. Decorate the finished style by adding a gorgeous fresh flower, a tiny crystal headband, hair snaps, magnets or jeweled clips.
When you remove the style do so carefully to avoid getting the string tangled. Take out one plait at a time. If you would like to see more of Patrick's wonderful updos and dressy styles for hair check out his long hair styling books and videos. A special thank you to Patrick for sharing this gorgeous updo. |
| If you want to talk more about this or other hair care articles on HairBoutique.com or anywhere else, please post a message on HairBoutique.com's Hair Talk Forums.
|
Please follow us on Twitter at: https://Twitter.com/HairBoutique. I look forward to meeting new people from all walks of Twitter and learning from their Tweets.

