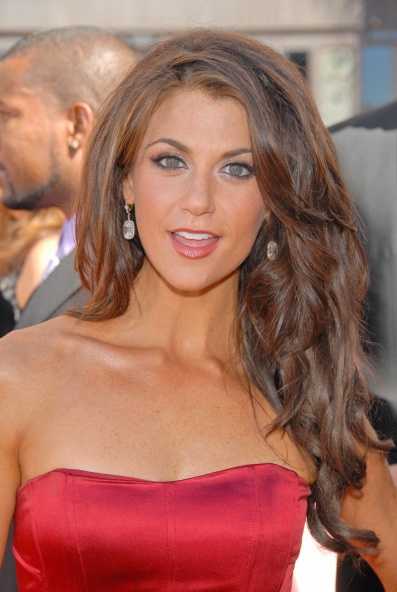
Jennifer Freeman: Long & Curly Strands
Introduction (Image of Jennifer Freeman by DailyCeleb.com - all rights reserved). Jennifer's entry into the world of acting was one of those infamous Hollywood discovery stories. A chance meeting with a talent scout at the local grocery store was the lovely star's start in the business. Jennifer and her mom were both skeptical when the agent asked if this serious student would consider commercials. (Image of Jennifer Freeman by DailyCeleb.com - all rights reserved). Jennifer initially was passed over for a younger actress, but fate intervened and the producer changed his mind. He decided he wanted an older teen to play the part of Claire. It seems that everyone believed that only Jennifer was right for the role. The rest is history.
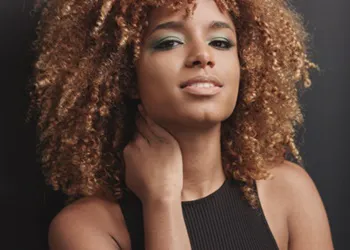
Au Natural Curls (Image of Jennifer Freeman by DailyCeleb.com - all rights reserved). To Steal Jennifer's Long CurlsAlthough Jennifer is blessed with natural tight curls that form into ravishing ringlets, it is possible for anyone with the right styling products and tools to copy her wild curls by completing the following steps: Step 1: Shampoo and condition your hair with your normal products designed for your current hair type, texture and condition. Step 2: Apply tennis ball size of mousse, gel or setting lotion to the palms of your hands and work completely through strands from approximately 1" below the roots to the ends of each section. Note: If your hair doesn't easily hold a curl, be sure to use a firm holding mousse or gel product. Products to Try: PhytoPro - Sculpting Gel #8 - 5 fl oz - New Formula & PhytoPro - Soft Holding Gel #2 - 5 fl oz (150ml) - New Formula or Rene Furterer - Anti-Dehydrating Structuring Mousse - Strong Hold or John Frieda - Frizz Ease - Corrective Styling Mousse - Curl Reviver w/ Sunscreen (Image of Jennifer Freeman by DailyCeleb.com - all rights reserved). Step 4: Separate tresses into 1/4th to 1" sections. (The smaller the sections, the tighter the curl). Strive to make all sections approximately the same size to create a uniform finished look. Step 5: Using end papers (available from any beauty supply location), fold paper over the ends of the hair before rolling with straws. Step 6: Carefully wrap individual sections of hair around the straw lengthwise to form natural ringlets and spirals. Start at the ends of your hair and roll towards the scalp. Step 7: Use bobby pins to anchor the new curl. Pin inside the base of the straw, lengthwise next to the scalp. For a tighter anchor, pin at the top and the bottom of the straw. Step 8: Dry hair under hood dryer until 100% dry. If a hairdryer is not available, use a blow dryer set on lowest speed with a concentrator and direct air flow to the wrapped curls. Step 9: Let hair completely cool before unwrapping the straws. (Image of Jennifer Freeman by DailyCeleb.com - all rights reserved). Step 11: Apply a shine serum or shine spray to the palms of your hands and carefully arrange new curls with fingers. Products to Try: Robert Hallowell Love That Shine Spray, Phyto - PhytoLisse (Formerly Phytodefrisant RelaxSerum) or Philip Pelusi - Glisten - Anti-Frizz Spray & Sunguard. Optional Ways To Create CurlsIf you have naturally curly hair like Jennifer you can recreate this wild look by utilizing a good mousse or gel and a long finger diffuser attached to a blow dryer. Shampoo hair, condition and rinse with final cool/cold spray. Towel blot to remove moisture. Separate hair into individual sections and apply mousse or gel from 1" below the roots to the ends of each section. Bend over at the waist and working from side to side use a long finger diffuser attached to a blow dryer. Lift each individual section of natural curls and direct air flow through the strands until 100% dry. To maintain uniform curl formation, celebrity hairdresser & Paul Mitchell Senior Premiere Educator, Barbara Lhotan of the famous Elie.Elie salon (703-893-2711) strongly recommends "adding uniform moisture to all sections of the hair in the form of a small amount of leave-in conditioner mixed with water in a spritz bottle". Apply an even amount of moisture to all strands before drying. Barbara cautions that you should "never ever run fingers through naturally curly damp strands until 100% dry." It should be noted that naturally curly hair can dry very quickly. If one section of hair air dries before being diffused, re-mist the air dried areas and finger diffuse in the same way as with the previous sections. After hair is completely dry Barbara recommends you take a "light shine enhancing pomade or silicone product and apply to the palms of the hands. Lightly brush the silicone coated palms over the top of your curls to give them shine and help block out humidity and frizz". Shaking Out Natural Curls OptionsIf you have naturally curly hair you can also try washing your hair with your regular shampoo and then applying rinse out moisturizing and conditioning products. Towel blot and then section hair and apply a mixture of leave-in conditioners, defrisants and mousse throughout the curls. Let hair air dry and then shake your head front and back and side to side to let your natural curls take shape. Half Up/Half Down Style Step 1: Using the thumbs on both hands, position them at the exact some mid-point location above each ear lobe. (Image of Jennifer Freeman by DailyCeleb.com - all rights reserved). Step 2: Slide your thumbs at a 45 degree angle towards the center of your head so that both thumbs will meet. Step 3: As you slide the thumbs, lift a section of hair that extends above each ear and extends from the top of the crown to the middle of the head. (Image of Jennifer Freeman by DailyCeleb.com - all rights reserved). The remainder of the hair will cascade down from the pony. Step 5: Attach a flower at the middle of the crown as shown above. Step 6: Use fingers to carefully arrange curls and tendrils. Finish by spraying with a shine enhancing hairspray. Swept To The Side (Image of Jennifer Freeman by DailyCeleb.com - all rights reserved). Complete following steps to create: Step 1: Shampoo and condition your hair with your normal products designed for your current hair type, texture and condition. Step 2: Apply tennis ball size of mousse, gel or setting lotion to the palms of your hands and work completely through individual strands from approximately 1" below the roots to the ends of each section. Step 3: Blow dry strands stick straight using a large paddle brush and a relaxing product. Step 4: Separate tresses into 1/4th to 1" sections. Use a thin flat iron to get all the way to the roots. Straighten hair from roots to middle section of the hair. Step 5: Brush hair to one side and capture into a ponytail using a Blax or Bungee cord. Direct the hair over one shoulder and down the front of the chest. Step 6: Separate ponytail section into 1 inch sections. Use a small to medium barrel curling iron and create ringlets holding the iron in place up to 30 seconds. Step 7: Let hair completely cool and apply a shine serum or shine spray to the palms of your hands and carefully arrange new curls with fingers. Step 8: Finish with a light hairspray. Soft Chignon Style Pony To create this sophisticated look follow the Step 1 through Step 4 in Swept To The Side (shown right above). (Image of Jennifer Freeman by DailyCeleb.com - all rights reserved). Step 5: Instead of brushing hair into a soft side pony, pull hair back into a low pony with the base resting at the nape of the neck. Capture the hair in a Blax or Bungee or other hair friendly elastic the same color as your strands. Be sure to leave tresses full around the top of the head and the sides to give a balanced yet soft look. Step 6: Separate strands into 2 inch sections and using a medium to large barrel curling iron (1 to 2") form ringlets. After each individual curl is formed, carefully pin it to your crown and let it cool. Spray with hairspray for hold. (Image of Jennifer Freeman by DailyCeleb.com - all rights reserved). Step 8: Lift one strand and wind it up and over the base of the pony to cover the elastic. Pin securely in place. Step 9: Use fingers to arrange curls so that they softly dangle from the nape of the neck. Step 10: To finish off the look, apply a shine enhancing hairspray. Versatile Styles Because Jennifer's naturally curly hair is in excellent condition and longer, she can style it a number of different ways. (Image of Jennifer Freeman by DailyCeleb.com - all rights reserved). She can blow her hair out completely straight, part it in the middle, which is very hot for 2005 and show off her beautiful length. Or to add dimension to her strands, she could apply a hair spray and use a flat iron to create bends and waves in her hair by alternating sections, working from the bottom up. Summary (Image of Jennifer Freeman by DailyCeleb.com - all rights reserved). Look for Jennifer's acting career to continue to skyrocket. |
| If you want to talk more about this or other hair care articles on HairBoutique.com or anywhere else, please post a message on HairBoutique.com's Hair Talk Forums.
|
Social Media Network Information
Please follow us on Twitter at: https://Twitter.com/HairBoutique. I look forward to meeting new people from all walks of Twitter and learning from their Tweets.


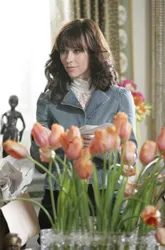
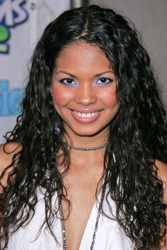 Jennifer Nicole Freeman is one of the hot new "It Girls" recently spotted on Hollywood's red carpets. This African-American actress was born in Los Angeles, California on October 20, 1985. If her face looks familiar you may have spotted the gorgeous young star as a spokes model for Neutrogena.
 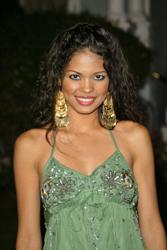 After some serious investigation the agent proven to be legitimate and Jennifer landed the audition of her lifetime for My Wife and Kids starring Damon Wayans and Tisha Campbell-Martin.
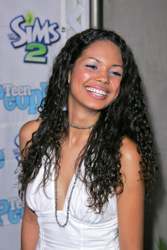 Although Jennifer, who is biracial, is often photographed with her long luscious curls worn wild and natural, the media has been mesmerized with her alternative styles ranging from a half up/half down curly style to stick straight strands brushed to one side or softly waved and pinned into a loose chignon.
 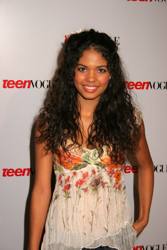 Step 3: Start with a complete pack of plastic drinking straws (you can buy at the grocery store). Cut the straws to match the current length of your hair. The straw should extend approximately 1-2 inches below the ends of your strands.
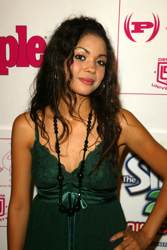 Step 10: Release curls by carefully unwinding the straw rollers from the hair. Go slow and unwind one rollers at a time.
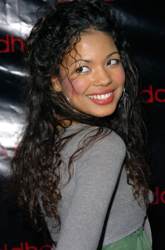 This style is easy to engineer once you have carefully crafted the curls as described above.
 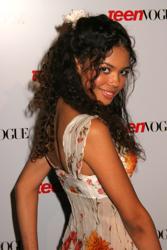 Step 4: When you are finished you will have two sections of hair. The top section that you created with your thumbs will form a top ponytail.
 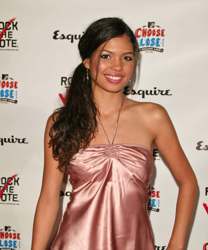 This sultry side pony combines a sleek straight crown captured on one side of the head behind one ear that cascades into a soft array of loose curls.
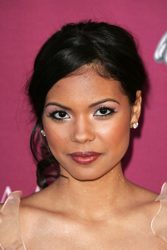 For evening elegance create a soft loose classically shaped pony chignon that softly coils behind the back of the head. This style is great for naturally curly hair.
 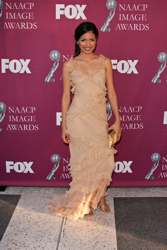 Step 7: After the entire pony has been curled and pinned and is 100% cool, remove pins.
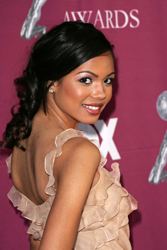 Whether Jennifer is letting her curls spiral out in a loosely controlled cascade or wearing it sleekly pulled back, she has many options to choose from.
 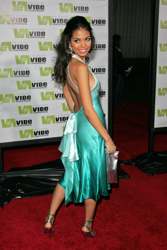 Jennifer Freeman has gorgeous, glossy naturally curly hair that is long and lush. With a little practice and the right products and tools you can achieve this rising star's lust-worthy style.
