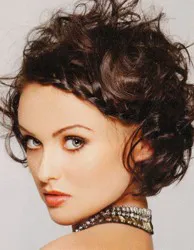
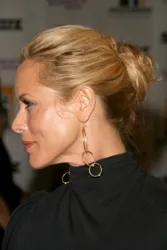
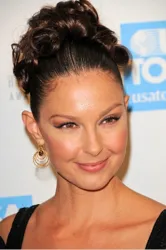
Introduction  | | | | Hair and Photography by Evening Plus | This beautiful updo will work for just about any special event such as a prom, spring formal, dressy party or wedding. Even after many years of writing about tons of gorgeous updos, this one remains my absolute favorite style. It's just so regal and gorgeous. This updo sits at the back of the head, so it would work well with many different types of bridal veils. It can be worn with or without a fringe. The hairstyle requires shoulder length hair or longer. Of course you can use hair extensions to achieve the length you need for this stunning updo. This updo looks great on any hair color. It works great on thick hair, but it can actually work just as well on just about any hair type. Naturally curly and wavy hair would need to be straightened before creating this style. Make sure you have a good hair setting product as well as a good hair spray on hand. This updo would look exceptionally elegant with a low back dress. Instructions For Creating This Gorgeous Dressy Updo -
Cleanse hair in lukewarm water with desired products and methods. Rinse well. -
Apply a good conditioner to the middle and the ends. Detangle with fingers or a wide tooth comb starting from the ends and working up to the roots. -
Rinse hair completely and finish with a cool/cold water final rinse to add shine. -
Towel blot hair and use a wide toothed comb or pick to untangle any remaining snarls. -
Apply a good leave-in conditioner to protect against blow drying. Add other desired styling products such as styling creams, mousse or similar. -
Blow dry the hair upside down from the roots until it is almost dry. -
Finish blow drying the hair right side up until it is completely dry. -
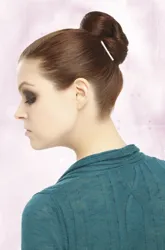
Carefully brush hair back off the face into a firm, but not overly tight, ponytail which sits halfway between the nape of the neck and the top of the head. Secure the ponytail with a "hair friendly" elastic band in the same color as the hair. -
Take a section of hair about 4 inches thick at the very top of the ponytail, separate from the rest of the ponytail and clip it at the top of the hair. You will finish the do with this piece last. Clip it up to keep it separate and out of the way. -
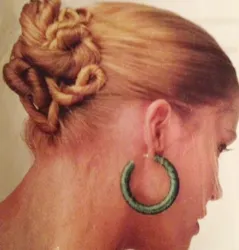
Separate the ponytail into 6 to 8 separate, but equal strands, approximately 2 inches in thickness. Note: To make the loops smaller or bigger you can adjust the number of strands and the thickness so that you have smaller and more numerous loops or bigger and fatter loops. -
Starting at the far left of the ponytail, take one 2" stand and twist it gently under and to the left, forming a big soft hair loop. Pin the bottom of the loop with a small bobby pin to the back of the hair. -
Take the next 2" strand and repeat the process making sure to pin the next loop so that it hides the previous bobby pin. -
Continue to make 2" big fat loops across the ponytail until you reach the far right side of the ponytail. Take the last 2" strand and loop it to the left and pin it. -
Spray the loops with a firm holding hairspray. -
Take the section of hair at the top and unclip it carefully. Divide the remaining hair into 4 equal strands. -
Take the first of the 4 strands and loop it around the finger to form a tighter loop than the ones at the bottom. Pin this tighter loop to form one side of a 4 leaf clover. -
Take the remaining 3 strands and loop the same way and pin to form the complete clover. When finished, the 4 tighter loops should rest on top of the bigger looser hair loops at the bottom. -
Spray the top clover loops and then lightly spray the entire updo with firm holding hairspray. -
Optionally you may pull a few little wisps of hair at the front of the face in front of the ears. This look is best with straight bangs that do not detract from the simple, but beautiful, elegance of the hair loops. With a little practice you should be able to do this updo by yourself with a good mirror. If you prefer, your hair stylist should be able to easily recreate this look for you. Note: To add sparkle to this gorgeous hairstyle you may want to add a jeweled hair pin to the top of the crown or you may want to add sparkly hairpins to hold the curls. If you would like to learn more dressy hairstyle for medium to long hair check out the many gorgeous haistyles in the HairBoutique.com Hairstyle Gallery. They will knock your socks off. Social Media Network Information Please follow me on Twitter at: http://Twitter.com/HairBoutique. I look forward to meeting new people from all walks of Twitter and learning from their Tweets. Visit us at Hairboutique.com located at: http://www.HairBoutique.com, on Facebook, MySpace and YouTube. from all walks of Twitter and learning from their Tweets. Visit us at Hairboutique.com located at: http://www.HairBoutique.com, on Facebook, MySpace and YouTube. Thank you for visiting us at The HairBoutique Blog and for leaving your comments. They are very much appreciated. We apologize in advance but must remove any direct advertisements or solicitations. Original Publication Date: 3/1998 - Revised Date: 04/24/11 |