

Wanna talk?
HairTalk® is the place for you!
Copyright 1997-2024, hairboutique.com, All Rights Reserved.

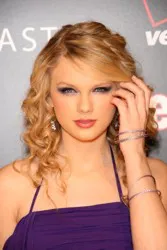
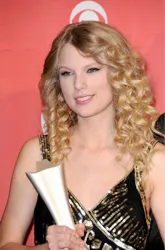
 Taylor Swift has gorgeous naturally curly hair which is also long, blonde and lush. Even better, she wears her hair au natural with her God given texture amped up into either picture perfect long ringlets or softer waves.
I rarely see Taylor with straight tresses but I have seen her wear her hair up in a variety of twists and buns.
Natural curly hair expert Barbara Lhotan told me that it's possible to re-create Taylor's curls with the proper styling products and your fingers if your natural texture can support curls. Even if they can't Barbara noted you can still get a similar look.
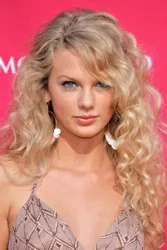
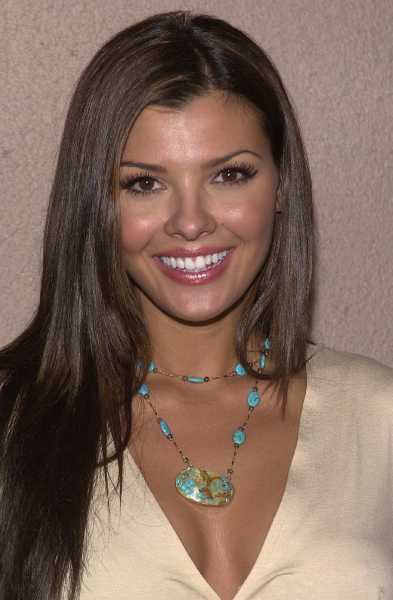
(Image of Taylor Swift - DailyCeleb.com - All Rights Reserved)
Do you need a curling iron? Not necessarily. Some people swear by their curling irons for copying Taylor's curly ringlets but there are other ways to get the same look without the heat. Since naturally curly hair tends to be fragile and prone to breakage, it's important to avoid lots of hot tool use on those delicate coils.
How To Recreate Taylor Swift's Curly Hairstyles
 Keep in mind Taylor has natural curls. Someone with natural stick straight strands will have to work to create ringlets like Taylor is blessed with naturally. To re-create her ringlets it is best to have naturally wavy, curly or kinky strands.
If you have stick strands you will need to use styling mousse or other curl defining products to help create and hold any finished curls which are created.
(Image of Taylor Swift - DailyCeleb.com - All Rights Reserved)
Step By Step Instructions For Creating Taylor's Long Curly Hairstyles
1. Start by cleansing hair either with a CO (Conditioning Only) formula or diluted shampoo formula. Since naturally curly and wavy hair tends to be very dry most commercial shampoos are too harsh to apply full strength to ringlets.
3. Finish with a cool/cold final rinse.
5. Apply leave-in conditioning, anti-frizz and curl forming cocktail appropriate for your hair type, texture and condition.
Option 1: If your hair is naturally curly or has a strong wave separate moist strands into 2" sections and wrap or twirl around fingers to form a ringlet of hair. Compress ringlet and pin to scalp. Or use hotdog shaped curl formers and wrap hair into ringlet shapes. Allow hair to air dry into natural ringlet patterns or sit under a hard or soft hood dryer until hair is completely dry. Remove curlers or pins and use fingers to arrange ringlets.
Option 2: Wrap naturally curly or wavy strands around straws for a wet straw set. Sit under hard or soft hood dryer or let hair air dry. Remove straws and arrange ringlets with fingers.
Option 3: Use long finger diffuser to dry individual sections of curls and/or waves into natural texture. Once hair is 100% dry use a curling iron to reshape or reform curls into tighter ringlet patterns.
Option 4: Plop wet hair and let water evaporate. Set moist curls on rag or other style rollers. Let air-dry. Once hair is completely dry re-moisten ends and then reform curls with hot rollers or curling irons. To reform with curling iron see instructions below
There are also other options for drying the hair either naturally or with heat or setting in wet sets. Pick the option that works best for your hair's natural texture, current length and condition.
How To Use Curling Iron To Reshape Ringlets
1. Separate hair into 1 1/2" sections. The smaller the section the tighter the curls, the larger the section, the bigger the curls. You may wish to start the ringlet pattern either right at the roots or a few inches lower. Use your own preferences as a guideline.
2. Twirl or wrap hair around fingers as suggested in Option #1 to form a ring of hair. Carefully remove your finger from the center of the hair ring. Insert a 3/4" or 1" curling iron and hold for 6-8 seconds. Avoid holding the iron to curls too long to avoid burning or frying natural curls.
3. Remove iron and carefully pin the pressed ringlet to your scalp to cool and set. Spritz with firm holding hair spray.
4. Repeat Steps 1-3 above throughout the rest of the head. You may wish to ask someone to help you with the back of your hair.
5. Once all of your hair has been hot curled, pinned and completely cooled, finish with a final spritz of spray over the entire head. Let spray completely dry.
6. Remove pinned ringlets one at a time. Use fingers to arrange. Bend over at the waist and gently shake out hair.
More Information
Please follow me on Twitter at: http://Twitter.com/HairBoutique. I look forward to meeting new people from all walks of Twitter and learning from their Tweets. Visit us at Hairboutique.com located at: http://www.HairBoutique.com, on Facebook, MySpace and YouTube.
Thank you for visiting us at The HairBoutique Blog and for leaving your comments. They are very much appreciated. We apologize in advance but must remove any direct advertisements or solicitations.
Please follow us on Twitter at: https://Twitter.com/HairBoutique. I look forward to meeting new people from all walks of Twitter and learning from their Tweets.

