


Wanna talk?
HairTalk® is the place for you!
Copyright 1997-2024, hairboutique.com, All Rights Reserved.

Introduction
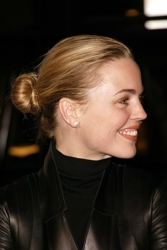
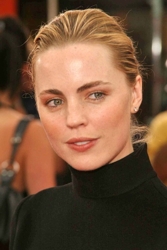
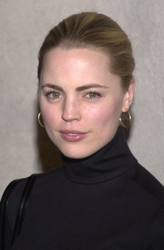
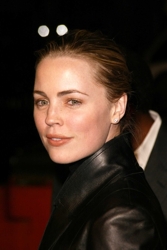
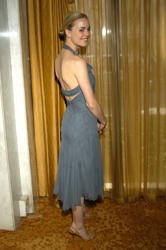
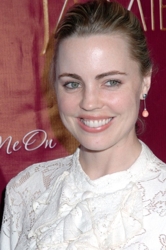
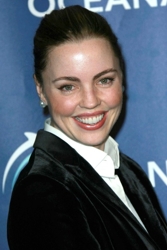
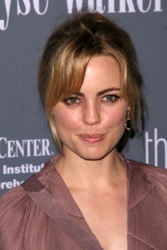
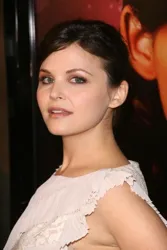
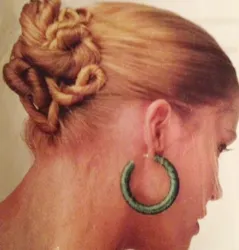
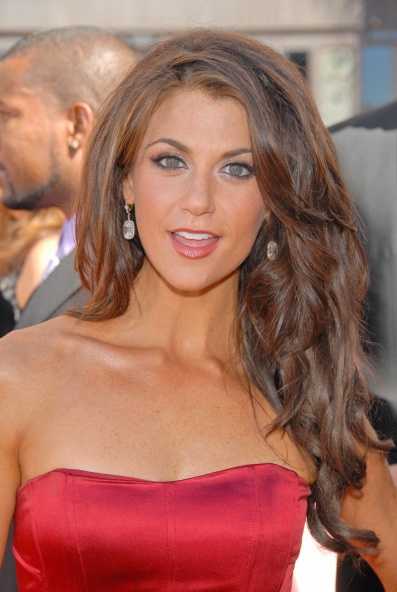
Capture sleek elegance and romance at your Prom, wedding or any special Party hair event wearing this sleek updo knot. The sleek updo knot never goes out of style, it just morphs to assume the shape of current hair trends. The sleek knot updo shown throughout this article can be worn completely plain or decorated with a wide array of hair accessories tied to your dress or gown. Stunning from all angles, this classically romantic sleek knotted hairdo is a favorite of Grey's Anatomy Melissa George. Whether you wish to complement your gown or compete with it is completely up to your discretion. For a formal event you might adorn the sleek knotted updo with a glittering tiara comb or crystal encrusted skinny headband. If you want to vamp it up, attach silk flowers or a Swarovski pearl or crystal encrusted barrette.
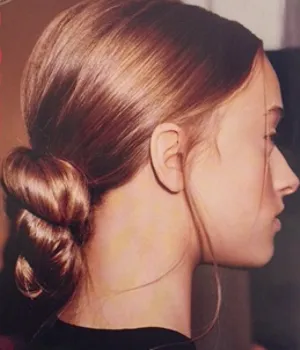
The great thing about hair accessories is that they can instantly transform a final knot updo. This style is comprised of one main ponytail-based-bun positioned at the middle of the head between the crown and the nape of the neck. This updo hairstyle may or may not be too complicated for someone to create at home. You might take the style on a trial run in the privacy of your home and see if you can duplicate the style. If not, don't hesitate to call on your professional stylist or a friend that has hairstyling talents.
This style generally works best on hair that is shoulder length or longer with medium thickness. It can work on hair that is fine or thin with the addition of hair pieces or extensions. Hair that is extra long can adopt to the style by adjusting the size of the bun or making two ballerina buns that are layered one on top of the other. Longer hair can also opt to leave a section of hair length as a type of "tail" and modify the look so that it is a half up/half down style with long lengths flowing down the back. Let your stylist guide you about the appropriateness of the style for your hair type and texture. Although this design can work on any hair texture, straight hair or hair that has been temporarily pre-straightened is ideal.
Wavy hair may or may need to be straightened depending on whether you want to keep the ends wavy or straight. Please note that super fine or thin hair may not hold the curls and loops as easily as coarse hair textures. If you wish to try this look on fine hair, be prepared for hair slippage with gel, strong holding spray and extra bobby pins. Step By Step InstructionsThis style works best on hair that is not freshly washed. When possible allow your hair to "age" at least 8-24 hours from your last shampoo. The natural hair oils will help the bun style hold tighter and last longer. Celebrity hairstylist Barbara Lhotan told me this bun hairstyle can be created on freshly washed and dried hair. However, it is important to dress newly washed hair with the appropriate styling aides to counterbalance extra soft or slippery strands. If you ask your professional hairdresser to create this hairstyle for you, let your stylist determine what type of hair (aged or not) they prefer to work with. If you prefer to shampoo your hair right before you create the bun be sure after the final rinse to towel-dry your hair, coat it with a quarter-sized amount of smoothing cream, gel or other styling product. As you blow-dry hair, use a paddle brush to smooth it, then brush back hair to form a tight ponytail at the nape of your neck. Twist and wrap your hair around the base to form a tight bun, and tuck the ends into the elastic. Hold the bun tightly in place with bobby pins the same color as your hair.
1. Begin by using a soft boar's head brush or similar natural bristle brush on your hair. Make sure that all knots and tangles are completely removed. Although this elegant style was designed without bangs or a part, if you prefer, experiment with a different type of part for a slightly different look. Wear bangs if you prefer and experiment with how you brush them on your forehead. 2. Working with individual sections that are about 1-2" in thickness, smooth all of the hair with a hot flat iron. Allow hair to cool completely before proceeding.
3. Using a soft boar's head brush or similar natural bristle brush brush all the hair from the hairline into a high ponytail that rests at the center of your crown. Secure the ponytail with Blax, bungee cords or other "hair friendly" elastics the same color as your hair. 4. Lift the ponytail straight up in the air and smooth the hair making sure the ponytail is tightly gathered at the base. Note: Apply a light gel or setting lotion to hair that is fine, slippery or does not hold styles well. This will help to anchor the hair better. Remember to apply any gel or setting sprays before adding hair accessories.
5. Smooth the ponytail back down and take the top section of the ponytail and twist the hair clockwise into a small bun. Carefully "fan the hair out" around the ponytail and the entire surrounding area as you create a small round bun formation. Once you have the bun formed to the size and shape that you like pin the bun tightly in place against your scalp. Carefully work from one side of the new hair fan to the other and pin the strands to form a soft floppy bun all around the base of the ponytail.
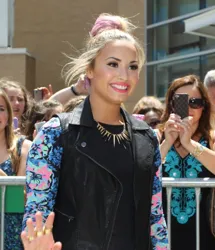
When possible use tiny hairpins that are 1/4 to 1/2 inches in the same color of your hair if you need a lot of pins to anchor. If you like you can be creative and pull random strands out along your hairline and the nape of your neck to form a soft fringe of tendrils. Curl the loose hair with a large barrelled curling iron (approximately 1") to get a soft but loose fringe of curls. 6. When you have the bun sculpted to your liking and have pinned it securely to your scalp, spray well with a firm holding spray. Apply a medium to heavy holding spray to the finished style. Add a light sprinkling of glitter gel for added dazzle or jazz up the sides or back or the style. Feel free to use tiny bobby pins to help anchor any loose hair. Or use a gel to smooth back any loose hairs from the crown or near the hairline in front.
7. Attach a tiara, soft circular headband or other hair accessory around the perimeter of the bun. Pin it against your scalp to prevent slippage. 8. Experiment with positioning the bun higher or lower or your head or twisting the hair tighter or looser. (Photos courtesy of HairBoutique.com & Barbara Lhotan. Photography by Eric Von Lockhart). The possibilities are endless if you take the time to play with different variations of this elegant bun style. The finished look is perfect for any special party, Prom, Wedding or other dressy hair event. CreditsHairstyles by Barbara Lhotan Hair accessory jewelry provided by HairBoutique.com SummaryThe key to the creation of this edgy ponytail is inventiveness and the willingness to do some heavy tousling. Go into the creation of this funky fashion pony updo with an attitude of experimentation and fun. Whether you wear this updo with a Prom Dress, a sizzling Party Dress, with couture fashion or dressed down fashions you can't get this ponytail updo wrong. It's a unique hairstyle and should be infused with your imagination and fabulousness.
| |||||||||||||||||||||||||||
| If you want to talk more about this or other hair care articles on HairBoutique.com or anywhere else, please post a message on HairBoutique.com's Hair Talk Forums.
|
Please follow us on Twitter at: https://Twitter.com/HairBoutique. I look forward to meeting new people from all walks of Twitter and learning from their Tweets.

