


Wanna talk?
HairTalk® is the place for you!
Copyright 1997-2024, hairboutique.com, All Rights Reserved.

Introduction
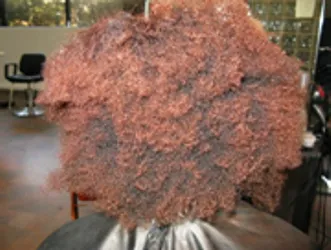
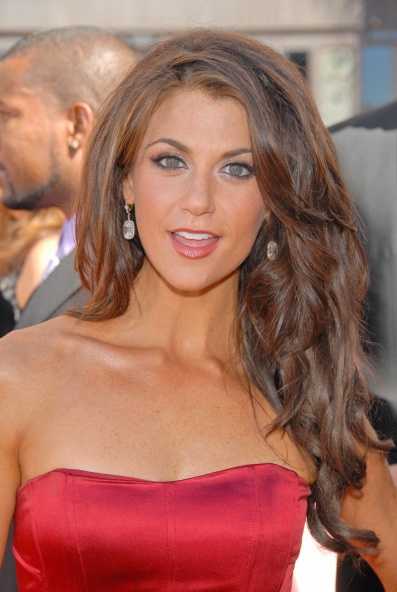
For many years I've been fighting my curls by doing everything to straighten it. I used hair serums, straightening shampoo, daily ritual blow drying, flat iron, gels, mousses, pomades and sprays. I was successful once I got it straight, but the moment I walked outside into the humidity, my hair was neither straight nor curly, but frizzy. I would literally put my hair in a ponytail until I arrived at my destination, just to keep it straight on the way there. Summer after summer, all the serums, gels, and pomades effectively worked, as long as I stayed inside an air-conditioned area. Outside activities were the worst, and were basically, ponytail days. My favorite treat for myself and my hair was to go to the hair salon and get my hair blow dried straight. My stylist dreaded it because she had to put so much legwork into my coarse curly hair to get it smooth and straight. Without fail, my hair looked "naturally straight" with volume each time. I mentioned to my stylist that I could never achieve this look without spending 45 minutes blow drying my hair section by section. I asked if it would be a good idea to get a relaxer put in my hair. She was against it. She would often say, "why would you want to straighten out those beautiful curls? People would die to have natural curls like yours". The only reason why I wanted to straighten my curls was because when I wear it curly, it gets too frizzy and poofy! My stylist also added that getting a relaxer put on my hair would make it flat and lose volume. I couldn't image not having my curls at all, on top of no volume, so I continued my crusade of blow-drying my hair straight for 45 minutes everyday. One evening I was browsing through the Internet looking for information on curly hair and I ran across a review on a product called Rusk's Radical Anticurl Relaxer. I had read about this product in a magazine a few years back. I had even brought the article for my hairdresser to read, but she dismissed it as just another relaxer. Note: For more details on hair relaxers refer to Chemical Hair Relaxers: Myths & Magic - Details, facts and tips on chemical hair relaxers.
Texturizer vs RelaxerThe article about the product was an interview with one of the Director's of Rusk. She was describing the product as a "texturizer" rather than a "relaxer". She mentioned that the anti curl formula is reversible, milder and gentler than regular relaxers and still leaves a slight bend in the hair. She described the formula as "valium for the hair". The director reported that it took the curls down a couple perm rod sizes. She also added that most people use it in the summertime to combat the humidity. Reading that article was enough for me to purchase the product to try it. Since the treatment was usually done at a salon, the article suggested calling the Rusk hotline to find the closest salon that performs the anti curl relaxer. The closest salon that used the product was 2 hours away from me. Anxious and determined to find the product, I searched the web. PackagingI found the product and it wasn't too expensive. There are 3 types of the Rusk Anti-curl formulas. These are:
I used Radical AntiCurl - Resistant Formula #2 for coarse, porous, permed or highlighted hair. The product comes in a box with one cream in a jar and a lotion in a bottle. The relaxer is a 2-step process. The first step is to soften the bonds of the hair. The second puts them back together. The relaxer lasts for 8-12 weeks. Since this is normally done at a salon, I had to visit my nearest beauty store to purchase additional supplies which included:
How I Tested The RelaxerI read the instructions on the box. I was first instructed to wash my hair thoroughly. Upon towel drying my hair, I was to apply a light leave-in conditioner to prep my hair for the Rusk relaxer. My next step was to comb my hair straight and separate it into 3-4 sections. Then I was to apply the cream from the jar with the painter's like brush. The hardest part to this task was making sure the back of my head received the same coverage of cream as the sides. Afterwards I was to apply and drench my hair in the cream. The instructions said to then comb through my hair being sure to keep it board straight and flat. I found that the hard part was not getting the excess cream from the comb all over my bathroom floor. I was instructed to keep this in my hair for no more than 12-15 minutes, while continuously keeping my hair straight. When 15 minutes were up I was required to rinse (no shampooing) for 5 minutes. Keeping my head under the sink for 5 minutes was near to impossible, so I rinsed as thoroughly as I could and made sure no product was left in my hair. This was achieved in less than 3 minutes. Then while keeping my hair straight I was to towel dry hair. Part 2 involved the toner. I was instructed to apply the lotion from the bottle exactly the same way as the cream was applied with the brush. I squirted my hair section by section then went over it with the brush. While doing that, I pulled my hair downwards to keep it straight. The instructions stressed that you must keep hair straight in order for this to work effectively. Since I have extremely curly hair, I found the curl re-springing as soon as I let go of the section. This was okay with me because I wanted some curl. Mostly I wanted less frizz to the curl. The toner was to be left in the hair for no more than 5 minutes while continuously combing hair straight in the process. The kitchen timer went off, and I was ready to rinse and look at my final outcome! I rinsed my hair and I could tell immediately that the front part of my hair was definitely board straight, but most of the bottom underneath parts was still a little bit curly. This was okay, because I still wanted the option to wear my hair either way. I towel dried my hair and applied a dime size of Phytodefrisant before blow-drying. I used a comb like attachment on my blow dryer to quicken the process. My hair was straight in 10-12 minutes. Beating my record of 25 minutes for my medium length hair was great! My hair wasn't too much straighter than before but it took less time to straighten it. I still had lots of volume and bounce left. The instructions said not to wash for 48 hours. To put it to the curly test; I had to wait a couple days. I washed my hair 48 hours later to test if there was still any curl left. To me my naturally curly hair, is like no other. It's very frizzy and the top layer is somewhat dry. I can achieve medium size curls, but not without the frizz. I applied a gel and attached the diffuser to my blow dryer and started drying. I could see my curls instantly reappear. They were less frizzy and a little more relaxed. The top layer and the front side of my hair did not hold much of a natural curl. I had to scrunch and use a curling iron to curl the sides. When my hair was 85% dry, I added a shine product and voila, perfect curls minus the frizz! RatingMy overall satisfaction with Rusk's Radical AntiCurl relaxer on a scale of 1-10, would be a 9. I think if this treatment were done at a salon, rather than at home, it would rate a 10. This difference is because there were certain parts of my hair that didn't get enough application and attention, due to my at-home treatment. Overall my hair was easier and faster to straighten. Wearing it curly was bearable again. Even in the humidity, there was a lot less frizz. SummaryRusk's Radical AntiCurl didn't make my hair any drier although it was a chemical relaxer. The product is milder than some relaxing products because it is based on thioglycolic acid, which tends to be easier on the hair and the scalp and has a lower pH. This was the best part. I didn't have to worry about damaging or drying out my hair with this relaxer. Rusk's Radical AntiCurl relaxer has my top recommendation especially for those who live in a high humidity climate. I recommend you become fully educated on the product before you buy it. Although I did achieve this look at home, my suggestion is if you want it done correctly, do it at a salon. Three weeks after my treatment my hair was still full and had lots of volume and shine. It could be worn both curly and straight. Alas, I achieved my ultimate hair goal! Social Media Network InformationPlease follow me on Twitter at: http://Twitter.com/HairBoutique. I look forward to meeting new Visit us at Hairboutique.com located at: http://www.HairBoutique.com, on Facebook, MySpace and YouTube. Thank you for visiting us at The HairBoutique Blog and for leaving your comments. They are very much appreciated. We apologize in advance but must remove any direct advertisements or solicitations. Original Publication Date: 9/2/2000 - Revised Date: 11/14/10 | |||
| If you want to talk more about this or other hair care articles on HairBoutique.com or anywhere else, please post a message on HairBoutique.com's Hair Talk Forums.
|
Please follow us on Twitter at: https://Twitter.com/HairBoutique. I look forward to meeting new people from all walks of Twitter and learning from their Tweets.

