


Wanna talk?
HairTalk® is the place for you!
Copyright 1997-2024, hairboutique.com, All Rights Reserved.

Introduction
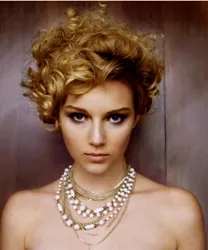
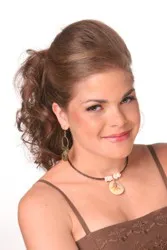
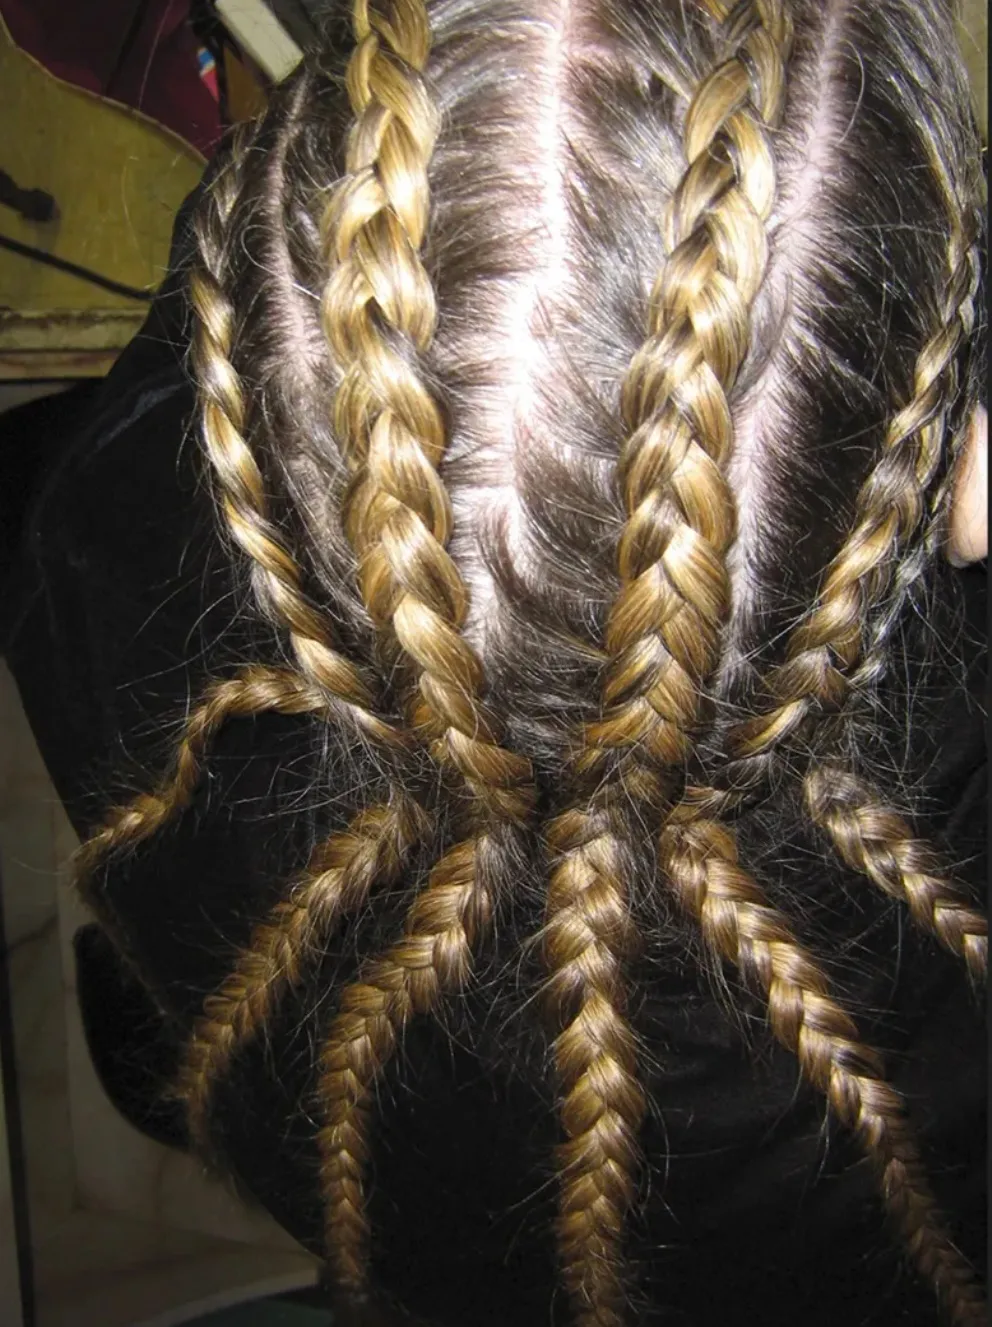
Tantalizing tendrils that cascade from the top of the crown into saucy ringlets are the key ingredient of this sizzling updo. Wear this gorgeous updo for any formal hair event such as a Prom, black tie event or wedding. This spectacularly curled hairstyle combines a sleek crown with endless rows of perfectly formed fat spiral curls that appear to bubble up from the crown. This updo style works well with Model Natalie's very long, naturally wavy, thick locks. The look compliments her face shape which is a classic oval shape with slightly squared jaw angles. Any hair that is either naturally curly, wavy or straight can easily be fashioned into a similar style. Tresses that are stick straight can be fashioned into a version of Natalie's style with the proper curling products and hot tools. Thin or fine hair may require extensions or pin-on tresses. Note: For fabulous clip-on extensions check out the Jessica Simpson HairDo extensions available at HairBoutique.com. Getting Started Notes
The key to this ringlet enhanced design is to have enough hair length and thickness to allow for the creation of a series of curls that can easily cascade around the perimeter of a top knot ponytail. Although Natalie's style was designed without any parts of fringes to show off her beautiful face and gorgeous eyes, a variety of different parts and bangs could easily be incorporated into a customized version. The beauty of this style is that is can be easily customized to fit any face shape or hair type. In order to create this gorgeous curled updo on Natalie's waist length hair, her strands were first washed, blow dried with a diffuser to enhance her natural curls and set on curlers with a focus on creating tight ringlets from the roots to the end. Her newly washed and dried strands were “prepared” with lots of styling products so that her strands were not so soft.
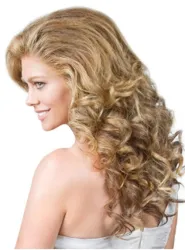
Best Styling TipsNatalie's thick, naturally wavy hair, falls just above her waist. This style works best for hair that is shoulder length or longer, and either naturally wavy, curly, permed or pre-set and pre-curled.
The style could be easily modified to work with medium to thick tresses that range from shoulder length to slightly below waist length. Short hair lengths could be transformed into this style through long hair extensions or the temporary use of clip-on tresses. Regardless of the hair's texture, type or actual length, it is important to start with strands that are dressed properly with the necessary styling products. Keep in mind that freshly washed hair may be overly soft and slippery, making it challenging to style. If you prefer to work with newly washed hair limit your use of conditioners or other products that make strands slippery soft or hard to manage. When possible, create this style on "aged" hair that is not newly washed. Natural hair oils help the updo hold tighter and last longer.
If you wish to add hair accessories be sure you have them ready to be added to the style at the end. Remember to use good styling creams, gels, sprays or similar products to give hair instant stylability. While less may be more, when it comes to creating dressy updo related styles, too little may not enough. Creating Style At Home
While this style might be accomplished at home with the help of some talented friends or family members, because the back involves the creation of lots of ringlet curls, when in doubt, ask your stylist to craft the style for you. If you do decide to do the style at home be sure to have several practice runs before the night of the big hair event. This updo style involves creating a lot of curls. Keep in mind that when crafted properly, the style can take some time to finish. Instructions - Steps To Create
1. Begin by using a soft boar’s head brush or similar natural bristle brush to make sure that all knots and tangles are completely removed from all strands. 2. Create a vertical part that extends from a few inches below and behind one ear and extends across to the other. After you have created the new part you should have separate top and bottom sections of hair. Clip the remaining section of bottom hair off separately from the top section. 3. Gather the top section of hair into a tight, smooth ponytail that rests at the middle crown section of the head. Secure the ponytail with a “hair friendly” Blax, Bungee or other elastic band. Note: Allow a few loose strands to float loosely around the face. 4. Divide the entire ponytail into individual strands that measure 1/2" to 1" in thickness.
Working completely around the diameter of the ponytail, apply a good setting product to each section of hair. 5. Roll the individual strands around self-adhesive rollers that measure approximately 1" in diameter. Note: If you prefer, use hot rollers the same size as the self-adhesive rollers. Although a curling iron is an option, it will take a lot longer to curl the entire ponytail section. 6. Add self-adhesive rollers to the loose tendril sections around the hairline. 7. Leave the bottom section of hair loose. Do not add curlers to this section of hair. 8. Allow the self-adhesive rollers to set. To help hold the set, sit under a hood dryer or use a blow dryer with a concentrator attachment and direct heat to the individual rolled sections. Allow hair to cool before removing the curlers.
9. Once hair is completely cool, dry and set to withstand a tight curl, remove the rollers. The result should be tightly curled ringlets cascading from the top of the ponytail, ringlets around the face and a section of straight hair near the nape of the neck.
10. Use your fingers to carefully arrange and smooth each individual strand of curled hair. If necessary use a 1/2" barrel hot curling iron to touch up any malformed curls or ringlets. Note: Make sure that the crown area is still neat and tightly pulled back towards the base of the ponytail. You may wish to carefully tighten and adjust. 11. Grab all of the ends of the ponytail in one hand and hold it up from the scalp at an angle. Using the other hand, grab the hair at the base of the pony. 12. Select half of the loose bottom hair at the nape of the neck and pull it up equal with the ponytail. Use this section of hair to wrap tightly around the base of the ponytail.
Wrap the strand around the base until all hair is used. Pin securely with bobby pins or U shaped pins in the same color as the hair. Note: The loose strands from the bottom section are used as the foundation to lift the curls up higher from the crown of the ponytail. 13. Select the remaining section of loose bottom hair and pull it up equal with the ponytail. Use this section of hair to also wrap around the base of the ponytail. Wrap the final strand around the base until all hair is used. Pin securely. 14. Use your fingers to pull the curls forward up higher onto the crown. Arrange the curls so that the cascade in a uniform pattern from the top of the ponytail base. Spot curl with a 1/2" curling iron if necessary.
15. Once all of the curls have been carefully positioned spray well with a firm hold hairspray. Note: The key to this look is uniformity. Strive to make all the curls the same size and tightness. When possible it is best to work from the inside of the style out. It is also best to start near the top of the style and work down towards the nape of the neck. When in doubt create a few practice styles to figure out the most efficient way to create the best cascading style. 16. When all the ringlets are in place, use your hands and fingers to capture any the loose "tails" and arrange them as part of the loose cascade around the back and bottom of the style. Note: Keep in mind that the cascading curls should ideally be arranged to hide any pins holding the twists against the scalp. 17. Spray well with hairspray like Phytolaque or Jessica Simpson’s favorite Phytolaque Soie made with real silk.
18.Apply a drop or two of a shine serum like Phyto's PhyoLisse, Rene Furterer's Spray Gloss or Robert Hallowell's Love That Shine Drops to the palms of your hands. Rub the serum into the palms and then lightly glide over the top of the style to add instant shimmer and shine. 19. Attach any desired hair accessory. Remember to always attach accessories last after all styling products have been applied to avoid damaging delicate accessories. Finishing TouchesThis dressy style is romantic, fun and flirtatious. It works beautifully with any type of chic, edgy fashions. Keep in mind that when this elaborately hairstyle is created according to instructions it is a versatile style that can work with just about any type of gown or fashion. This hairdo can be toned down or glammed up depending on individual tastes. Social Media Network InformationPlease follow me on Twitter at: http://Twitter.com/HairBoutique. I look forward to meeting new Visit us at Hairboutique.com located at: http://www.HairBoutique.com, on Facebook, MySpace and YouTube. Thank you for visiting us at The HairBoutique Blog and for leaving your comments. They are very much appreciated. We apologize in advance but must remove any direct advertisements or solicitations. Original Publication Date: 09/01/09 - Revised Date: 09/07/10 | |||||||||||||||||||||||||||||||||
| If you want to talk more about this or other hair care articles on HairBoutique.com or anywhere else, please post a message on HairBoutique.com's Hair Talk Forums.
|
Please follow us on Twitter at: https://Twitter.com/HairBoutique. I look forward to meeting new people from all walks of Twitter and learning from their Tweets.

