 HairBoutique.com is proud to announce that for Prom Season 2002 we have partnered with some of the leading Prom Dress designers to help you select a gorgeous Prom dress and a matching dream hairstyle. (All photos included in this article are copyrighted by Alfred Angelo and may not be copied without express permission).
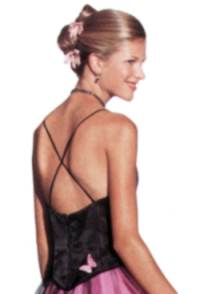
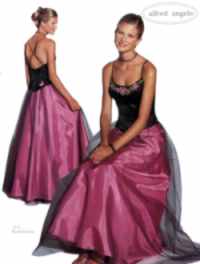
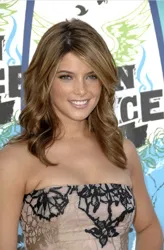
 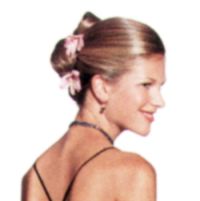 The stunning gown shown in this article is the Black/Fuchsia spaghetti strap crisscross backed gown (3312) by
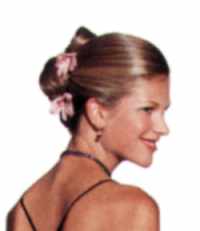
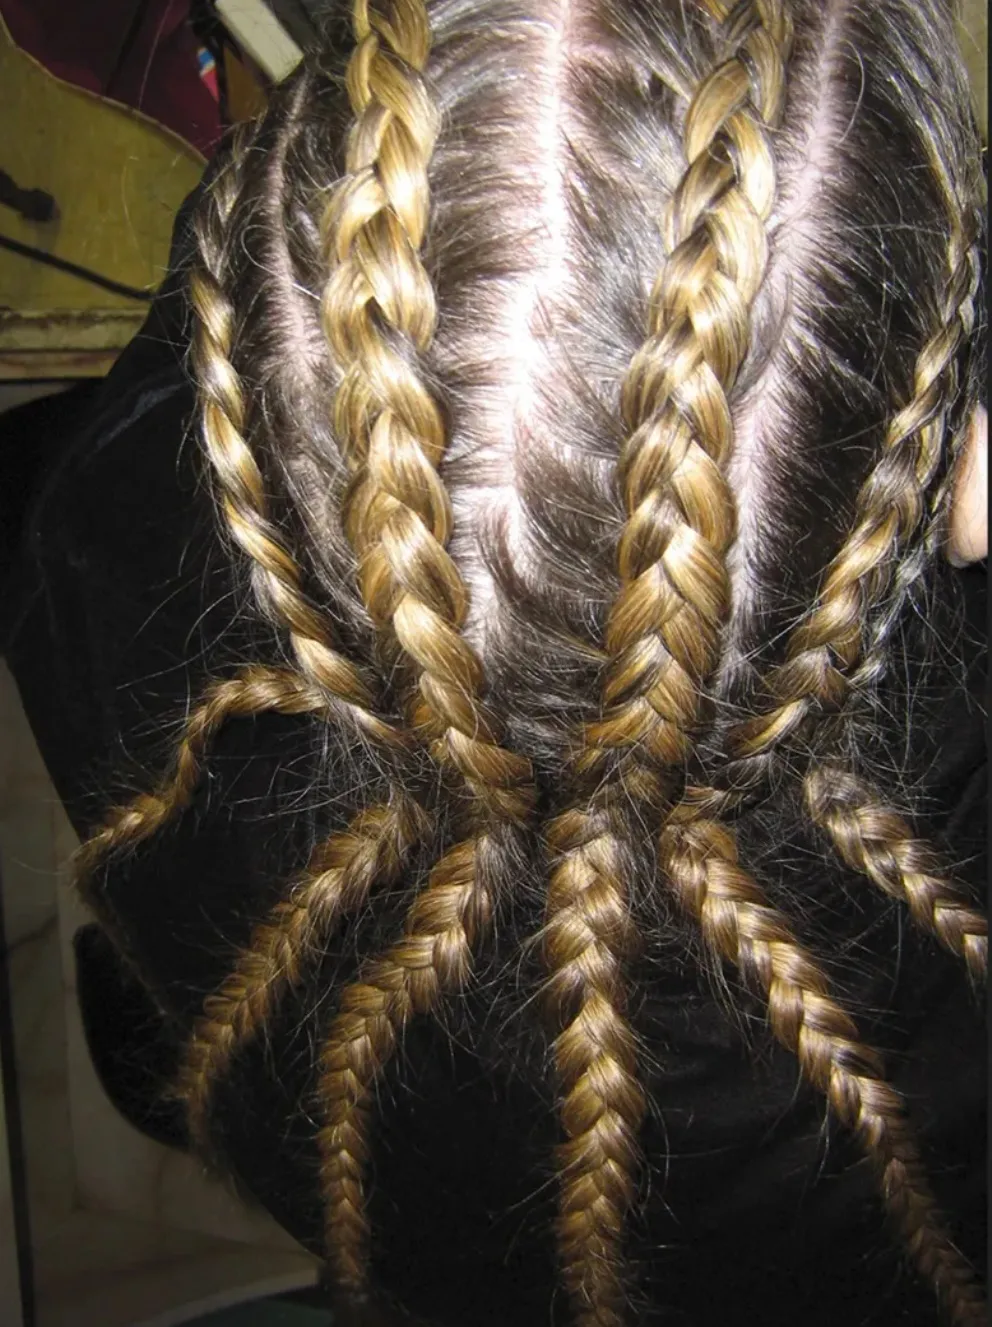
 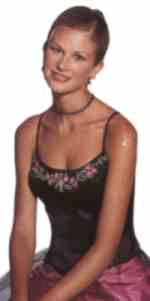 This updo normally requires the assistance of a professional stylist or a friend or family member that can help you fix your hair. Because the hair has sculpted loops that hug the back of your head and crown, additional hands are required to achieve a carefully finished style.
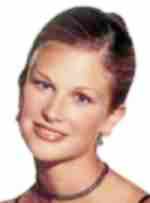 The model in this photo has medium length, medium thick hair with a slight wav. This updo style is designed to work best for hair that is medium thickness, shoulder length or longer.
 If possible, create this look on hair that is not freshly washed. Right after a shampoo hair tends to be soft, slippery and harder to work with. This is especially true for an updo style.

 Alfred Angelo is the most recognized brand of formal and bridal dress apparel around the globe. For the past 70 years Alfred Angelo has been dressing Prom goers in elegant and affordable gowns. Alfred Angelo is the world’s leading maker of Prom, wedding gowns and bridesmaid dresses, yet they retain the personal touch of a family owned company.


Wanna talk?
HairTalk® is the place for you!
Copyright 1997-2024, hairboutique.com, All Rights Reserved.

Introduction
A series of Prom 2002 hair design articles will be published over the next several months at HairBoutique.com. These articles will include photos of actual Prom 2002 fashions that you can purchase along with step-by-step styling instructions for stunning hair designs that compliment each Prom style. Alfred Angelo's Black Fuchsia Creation
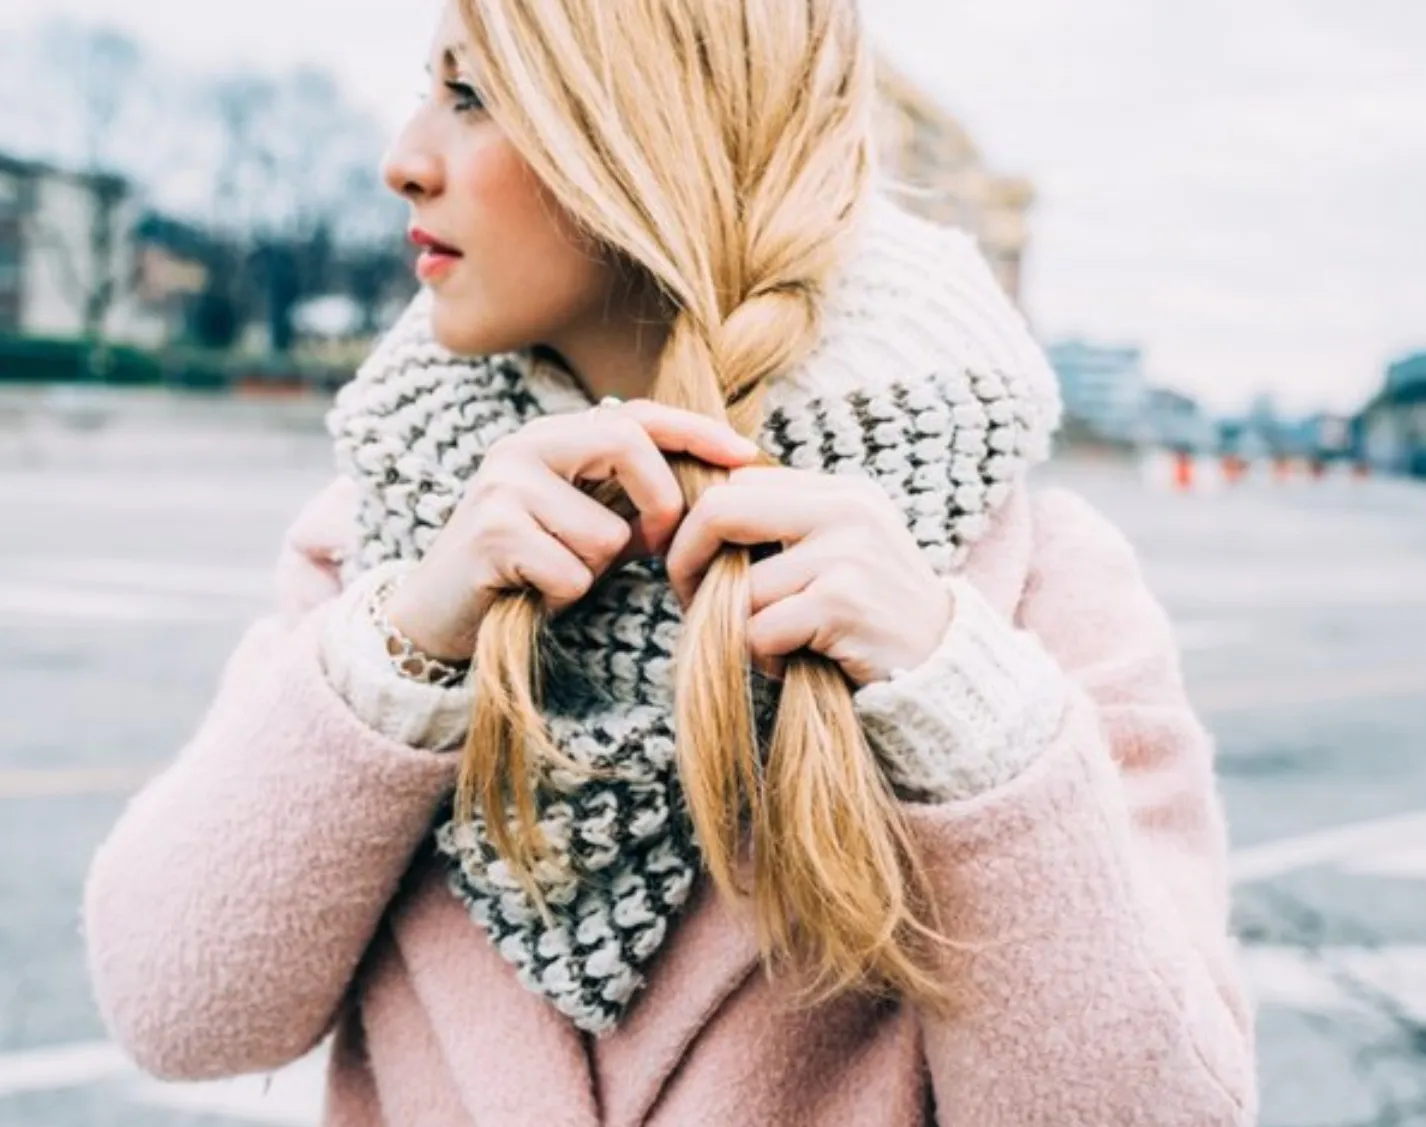
This is a very flattering style for many body shapes and instantly slims and elongates body forms. The dress has a gorgeous fuchsia bodice with a black net overskirt. The top of this incredible gown is a black low cut front with a gorgeous floral jewel line decoration highlighting the top of the dress. (Where To Buy: Alfred Angelo Store Locator). With a stunning front and elegant back, this fairytale dress calls for a soft yet sleek romantic updo. The hairdo described in this article is designed around a very simple twist that hugs the crown and the back of the head. The hair is completely pulled back from the face and neck. This style can be worn for any formal event.
Simply Elegant Sculpted Updo
If you wish to try this style on your own, be sure to spend time in several practice sessions to see if you can duplicate the look. If you have never worn an updo before, be prepared to adjust to a change in your hair comfort factor. If you are in doubt about how well you would look in this style, have your hair done by a stylist several weeks before your Prom and have a friend take photos. This will give you a chance to look at yourself as others would see your hair. Getting Started Tips
Thin/fine hair can also easily wear the look. One option to consider with baby fine hair is to use a volumizing shampoo and gel or spray to blow up the hair cuticle. This will help achieve a fuller set of hair loops for the crown and back of the head.
Thick or super thick hair may not be able to achieve the desired level of sleekness. It would be possible to re-create this look on thick or super thick hair that has been relaxed. This elegant sleek style highlights the face along with the dress. Although most face shapes will be flattered by this style, if your face is long and thin it is better to design the updo so it lays closer to the head with more volume added along the sides. Oval and heart shaped faces will look beautiful in this style. Square faces can achieve balance by carefully pulling ringlet tendrils down around the jaw and cheeks to soften. Round face shapes can achieve a slimming effect by adding more height at the crown, adding tendrils at the cheeks and playing with a light dusting of side parted bangs or hairline tendrils. Instructions
Step One: Starting at the front of the head use a pointed comb and make a part down one side of your head. Although a center parting is possible, you will need to consider how to adjust the volume of the updo to lay properly on your head. If you prefer bangs, these can also be added to the style. Keep in mind that if you modify the style from the instructions the look will not be identical to the photos shown in this article.
Step Three: Set your entire head on either velcro or hot rollers that are large to very large (2 inches or more) in diameter. Large rollers will add uniform texture and make the style easier to achieve. Remember that it is important to experiment weeks before your Prom to determine which size rollers give you the best texture for this style. If you don't have large rollers use a large barrel curling iron and methodically work from one side of your head to the other side. After you have curled a section of hair, pin the hot curl into place. Once all the curls are cooled, remove the pins.
Note: Do not use a brush or comb. Use your fingers to style and arrange your hair. Step Five: Carefully brush all the hair from the hairline back to the crown in a soft ponytail. Be careful to brush as lightly as possible to retain the new curler set. Use your fingers as much as possible to smooth. Step Six: One you have all the hair brushed back from the hairline use a comb to make a diagonal part along the back of the head that runs from ear to ear. Step Seven: Separate the back of the hair into two individual hair chunks. Tie off each of the two hair chunks into a soft ponytail or hair bunch. If possible use a "hair friendly" elastic or clip that matches your current hair color. When you are finished with this step you will have one ponytail at the top of your crown and one ponytail between the nape of your neck and the middle of your head. Keep the hair as close to your head as possible since this updo look is sleek, elegant and close to the scalp. Step Eight: Carefully release the hair from the top ponytail and separate the entire amount of hair into two equal sections. Clip off each section temporarily. Step Nine: Smooth the first section of the top ponytail back and crossed above the bottom ponytail. Drape the section as you would like it to lay above the ponytail. Pin with hairpins that match your hair color at the base of the ponytail. Step Ten: Smooth the remaining section of the top ponytail back and crossed above the bottom ponytail from the opposite side. Pin with hairpins that match your hair color at the base of the ponytail . When you are finished the top hair will have been carefully merged into the top of the bottom ponytail to create a soft "wrap" effect.
Remember to take your time and check each strand as you pin. Make sure that each strand is firmly pinned once you position it. Step Twelve: Once the two sections of the top ponytails are pinned and "wrapped" into place, subdivide the bottom ponytail into 1-2 inch single strands. The number and thickness of strands will depend entirely upon the thickness of your hair and how many twists you desire to create). Step Thirteen: Take each individual hair strand, one by one and lightly loop or twist clockwise. Secure the twists above the below the ponytail flatly against the head. To hold securely, spray each twist with holding or styling spray as you work. You have the option to make big fat loops or twists or smaller twists. The key is to sculpt the loops or twists from the middle of the head to the bottom as shown in the photos in this article. Step Fourteen: Work from the top of your head down to the bottom until you have pinned the number of loops or twists desired. You can go with just 4-5 large loops or many smaller twists. To hold securely, spray each twist with holding or styling spray as you work.
Step Fourteen: Carefully tuck away and pin any remaining hair ends from obvious view. Either pin down any straggling pieces for a smooth elegant look or tease them up for a more feathery look. Add a little styling wax for a more edgy look. Or keep the look soft by spraying with a light hairspray to finish the look.
If you prefer wear this beautiful style without any adornments. If you use fresh flowers, wait to pin them into your hair right before you leave for the Prom to keep them as fresh as long as possible. Note: A special thank you to Alfred Angelo for sharing this gorgeous gown with HairBoutique.com. If you would like to purchase this gown go to the Alfred Angelo site for a list of retail stores that carry this design. About Alfred Angelo
Founded in the 1930’s by Alfred Angelo Piccione and his wife, Edythe Piccione, today the company is owned by their son and daughter, Vincent and Michele Piccione. Together they dedicate their business, technological and creative talents to ensure that Alfred Angelo continues to provide beautiful formal wear of the finest quality at affordable prices. You can find Alfred Angelo gowns in thousands of retail stores throughout not only North America, but on every other continent as well. Alfred Angelo is unique because they have a design team that creates both exquisite gowns and coordinating looks. They have an extensive collection of gorgeous Formal dress styles, most of which are very affordably priced, all of which are available in sizes 16W-28W. We invite you to explore all of AlfredAngelo and their gowns at: www.alfredangelo.com. Browse through the complete collection of gowns, learn some key gown terminology, and most importantly, use the great store locator/where to buy guide, to learn which stores in your area carry these gorgeous products. |
| If you want to talk more about this or other hair care articles on HairBoutique.com or anywhere else, please post a message on HairBoutique.com's Hair Talk Forums.
|
Please follow us on Twitter at: https://Twitter.com/HairBoutique. I look forward to meeting new people from all walks of Twitter and learning from their Tweets.

